Equipment Reviews – Finger protectors

We recently ran a couple of sessions introducing archery at a local school and wanted to make things as easy as possible for ourselves and the archers,  so we bought some finger protectors to go on the junior bows rather than worrying about issuing out finger tabs.
For those not familiar these devices, let me give you a quick description of what they are. There purpose is to protect the archers fingers when drawing back and releasing the string. Anyone who has shot a bow several times with no finger protection knows full well how sore your fingers can become, even if only using a bow with a light poundage draw weight.
These protectors remove the need for the archer to use a tab or shooting glove. This makes them great for taster sessions or have-a-go events. They fit over the bow string serving at the nocking point.
Whilst they are a great addition, they are a pain to fit on the string so I thought I would offer these thoughts as a review.
Since they have to slide over the string, getting them over the string loop isn’t an easy task. Trying to thread the bow string through the small hole in the protectors is near impossible. I tried using thin thread, even wire to help give me purchasse to pull the string through as you can’t push it through the hole.
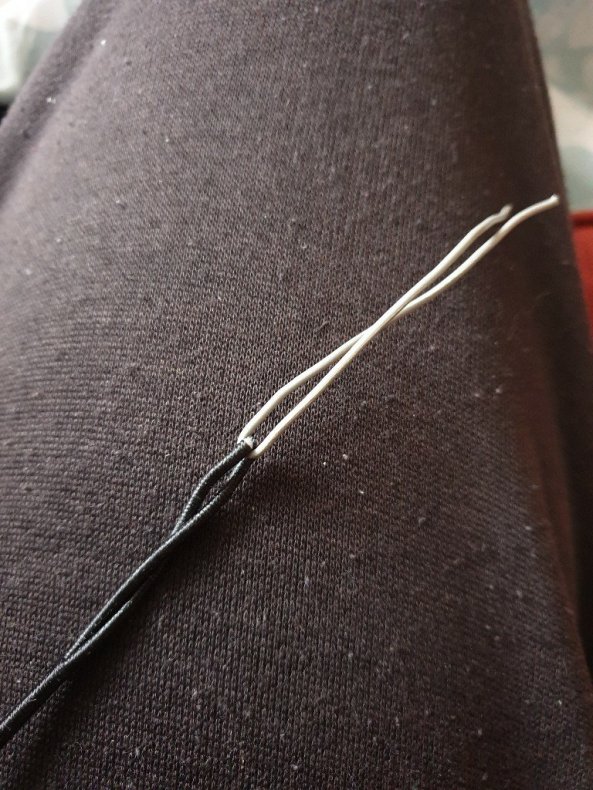
Wire on string loop.

You have to be particularly careful not to damage the bow string by using wire or other thin string, as you run the chance of damaging or worse cutting the bow string threads. In the above image you can see the serving thread opening up.
I also found that thin wire snapped easily. I ended up using a cable tie I normally use for my mobile charging cable.
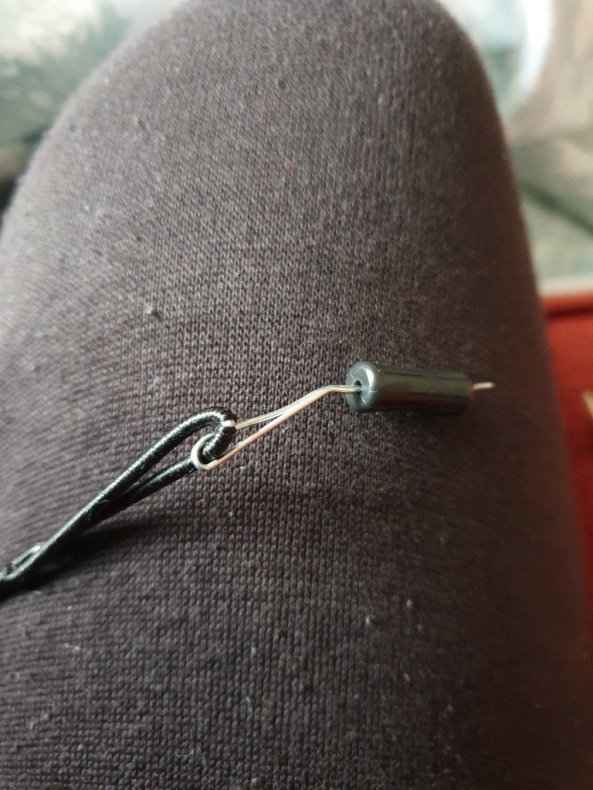
Threading wire through

Make sure you are working from one end of the string so you get the two pieces in the right spot.
I found once i had threaded the wire through, I could use a pair of pliers to grip the wire and pull the bow string.
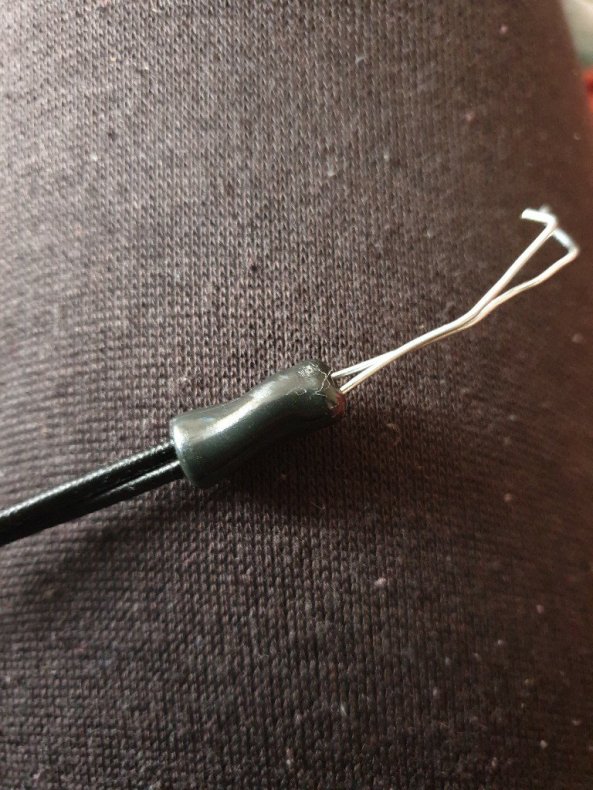
Pulling string through

We have noticed they do move a little on the string when being used,, so you might want to monitor this. You could add a loop of spare serving at the bottom of the protectors on the string to stop it moving.
Warming in cup

Warming the plastic in a cup of hot water.

Top tip –  I found dropping the protectors into hot water prior to fitting them on the string made them slightly more malleable. This was a trick I picked up when fighting to fit different attachments to garden hoses. I found warming the hose made it more flexible so I tried it with the protectors and it worked.

Where did we get them?

They are available from most archery shops and we bought ours from Merlin Archery.
N.B. There are two types, one solid one large enough for those shooting three fingers under and a type which comes in two parts for those wanting to set up for splint finger or Med lose.

How much do they cost?

The ones we bought were £2.36 for a pack of 4. There are others available from different manufacturers.
Nusensei has a great YouTube on fitting these if you are thinking of using them.
Overall I think they work really well for have-a-go sessions or for junior bows. Since they are a pain to fit we bought spare strings and fitted them to these. This meant for each of our junior bows we have two strings, one with, one without.
One last point about doing this. Take your time. I rushed doing this as had four to do. This resulted in me fitting one set perfectly, but to the wrong string!
Thanks for reading and stay safe.

Setting up a target boss – revisited

With recent worldwide developments concerning COVID-19 seeing more and people self isolating, working from home or simply having a lot more spare time on their hands, there has been quite a lot of posts on Facebook and other sites about home ranges, or practising at home.

I am going to highlight a few things you might need to consider. I am no expert and this is by no means a definitive list, but more of a starting point of things for you to consider.

  • What are you going to shoot at? What type of target or target boss? Will it be sturdy enough to stop your arrows at close range? Check out What target is best for me?
  • Can you safely shoot in your garden without endangering yourself or others? Think of pets, child, wildlife or even surrounding livestock? Consider also garden sheds, greenhouse and garages.
  • What of overshoots into neighbouring gardens, farmers fields etc?
  • Do you have insurance if anything goes wrong? Chances are your house insurance won’t cover you and you may have to take out some form of specific insurance.

Location, location, location

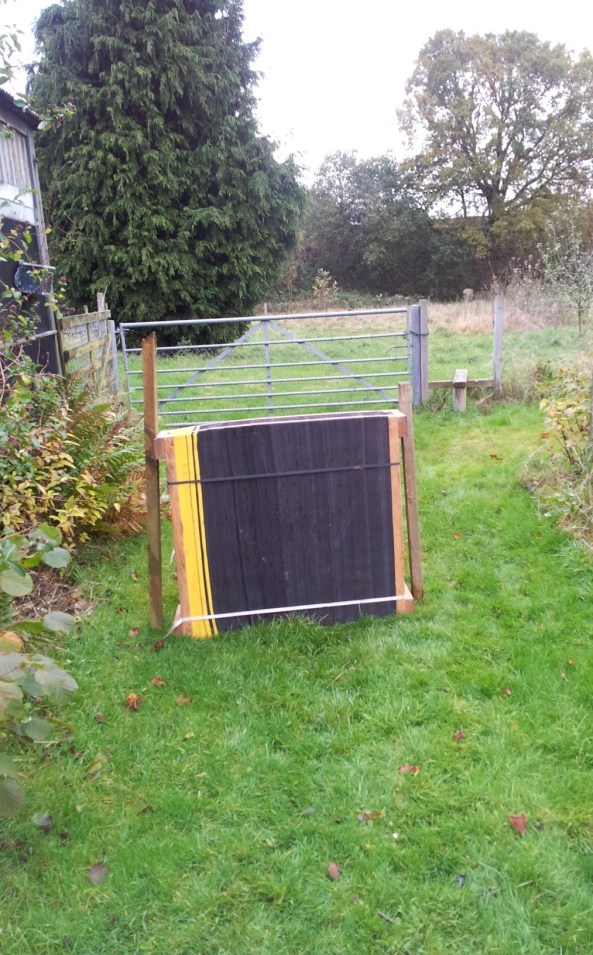
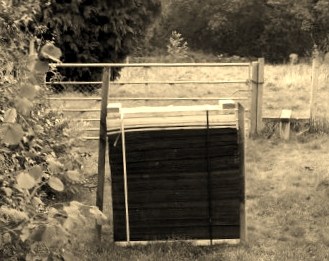
No I’m not talking about the TV property program commonly seen in the UK, but the physical location of your target boss. Look at the space surrounding the boss in the image below. What do you see?

Target Boss

Firstly there appears to be a stile behind and to the right of the boss. Does this mean there is a footpath behind the gate and we are likely to see people walking past?

What about the space behind the boss with regards to overshoot? Do you need to have something that will catch and stop a stray arrow? A safe over shoot area is vital for any target positioning. The metal gate seen behind this boss is also a risk. If an arrow misses the boss and hits the gate it is likely to deflect in any direction.

Did you spot the wall of the building to the left side of the target? You wouldn’t be able to see people approaching from that direction.

Securing the boss to the stakes is vital to ensure it doesn’t topple over when arrows are removed. It is worth considering whether the stakes need to be proud of the boss, unlike the image below. Also try to put them to the side or rear of the boss frame so as to avoid or limit the number of arrows hitting them.

One quick cautionary tale of a friend who set up a target boss in his garden. Unfortunately it was quite an old target boss and the arrow went through it, through the wooden shed wall behind and straight into his lawnmower! He wasn’t allowed to practise at home anymore.

Those are a few thoughts and topics to consider when positioning practise bosses. Have you got any further advice? If so why not add a comment below. Lets look at the orientation and securing of the target boss now.

Securing the boss

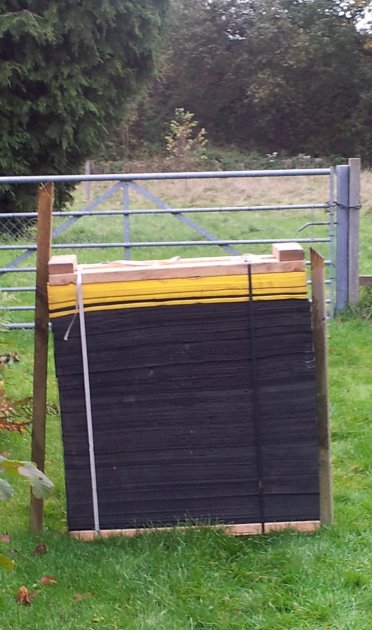
Setting up a boss is a common activity, but does require some thought and care to ensure it is done both correctly and safely, whether this be on an archery course or as in this example in the garden for a home practice range. Here you can see a boss having been erected ready for practise. Looks good? Can you spot any issues?closeup

Well one commonly made mistake when setting up a boss of this nature is forgetting to check where the metal binding for the plastic strapping is located. These should always be on the back of the boss and never facing the direction of the shot.

Why? The binding clips used for banding can damage arrow tips if they are hit. I have also seen arrows shot from a compound bow hit one of these metal fastenings and bounce straight back some 15 yards, landing at the archers feet.

You should also ensure the wood frame of the boss is always to the side and not on top or bottom.

Why? If the arrow falls low, it will run the risk of hitting and embedding itself in the wooden frame, which is likely to  result in some work to extract. If the arrow impacts at the top of the boss it runs the risk of deflecting off in any direction . So rotate the boss to ensure the wood frames are on the side of the boss.

Target Boss

Insurance

Give some serious consideration when it comes to insurance. Some people believe that being members of a national archery society or club gives them cover to shoot at home, which isn’t necessarily true. I know this is something that has come up on the National Field Archery Society Facebook group and I expect it the subject has been raised on other sites too.

We have our own personal insurance that covers Sharon and myself when shooting on our home range, which we got through Gunplan (https://www.gunplan.co.uk/) . The field is also registered as one of the clubs sites as we use it for training sessions.

N.B. The target boss doesn’t normally sit there, it was simply positioned there for the photos for this post. It’s normally in the field beyond the gate. We are fortunate in owning the field at the rear of the property and know there is no public access or routes to it other than via our boundary. We have set up a 40 yard pegged range, with a 60ft over shoot before a backstop of old carpets at the fence line and then  30ft high earth embankment beyond.

I hope you find this article of interest and if you have any comments let me know. I’m putting a brief one together on the use of backstop nets too, when I get the chance. Thanks for reading and stay safe everyone.