What arrows for beginner?

Early this week Sharon was asked by an archery friend what arrows she thought would be good for her brother. What an easy question to answer … NOT 😉

She asked me and my response was to suggest she found out some more information first

The type of arrow is dependent on numerous factors many of which I’ve covered but in short

  • Draw Length
  • Bow weight
  • Club rules
  • Bow Style – compound, recurve, longbow etc
  • Purpose – hunting/target/field etc

Shooting an arrow that is not matched to your draw length and poundage can be dangerous as it may snap under the pressure if the wrong poundage, or you might draw it off the arrow rest if too short. Beginners often find their draw length increases as they get more used to shooting, so make sure any arrows allow for this.

Likewise too light an arrow can damage your bow as there is insufficient strength and weight in the arrow to cope with the energy from the limbs, resulting in damaged limbs.

General rule of thumb is the longer the draw length and the heavier the bow draw weight you end up going for stronger arrows ie the numbers higher. This is explained best here, taken from the Easton Arrow site

The four-digit number refers to the outside diameter and wall thickness of the shaft. The first two numbers are the outside diameter in 64ths of an inch. The second two numbers are the wall thickness in thousands of an inch.

For example, a 2514 shaft would be 25/64th of an inch in diameter and .014 of an inch wall thickness. OD and wall thickness are the two variables in controlling spine for aluminum arrows.

http://www.eastonarchery.com/frequently-asked-questions

Quick point on club rules. Some clubs do not allow archers to use carbon arrows, others ban beginners from using them. Personally I am not a fan of beginners using carbon arrows simply because I prefer them to use alloys. Alloys are easier to find if lost, if they glance off a tree they might be slightly bent but can’t be straightened, they don’t break / shatter leaving carbon shards. This topic is covered in the recent stick and string podcast

For complete beginners I tend to use Easton Neo alloy shafts, they are 1618 and at full length 32 inches. They are great arrows for low poundage bows, up to about 24-26lb at 28″ above that they get a bit whippy.

Easton Neo

Easton Neo

Another good arrow for a slightly more experienced archer is the Easton Jazz.  They range from 14130  to 1916. I tend to find most beginners find the 1816 work well from their first bows that come in about 26lb-30lb.

Easton Jazz

Easton Jazz

Here is a link to Easton Arrows selection chart http://www.eastonarchery.com/uploads/files/52_target-sel-chart.pdf  this will help work out whats best for your bow.

As the archer progress good alloy arrows are the Easton x7  (think they are 1614 going from memory) which Sharon uses (recurve 38lbs and 26″, yes 26″ not 28″) and work well for the field archery we do. I’ve got some XX75 that are pretty robust too, but I tend to shoot wooden arrows more.

There are loads of really useful sites out there and a wealth of help in local clubs, so do a few searches and if you can try different arrows before you buy. Jordan Sequillion blog site covers this well as do others like Charlies

Please note I have no alliance or connection with any of the shops or manufacturers I mention here, other than being a customer. So I have no vested interest in this other that trying to help an offer my opinion.

I hope this is of interest and if you have any questions drop me a line. Always happy to help if I can. Thanks for reading.

Literature review – Shooting the Stickbow

Shooting the Stickbow

Finally got round to writing another one of these literature reviews, sorry for the delay. So this one will be on

Fellow archer and blogger (Charles’ Archery blog) has written a great review of this book too and you can find it here.

So why did I go for this book over others?

I bought this book following a recommendation from a fellow archer (Chris Smith) He had been lent a copy and had said how informative he found it. Chris is also a NFAS coach and we had both been reviewing different books for coaching tips and as a good all round resource. This book ticks many of these boxes.

It is a very comprehensive guide for archers, covering the basic very well, more importantly you will find it an easy read, not too technical or complex. On this point I would say it is more technical than many of my other reads, but it is still an easy read. It covers the basics well and what any archer needs to know to progress.

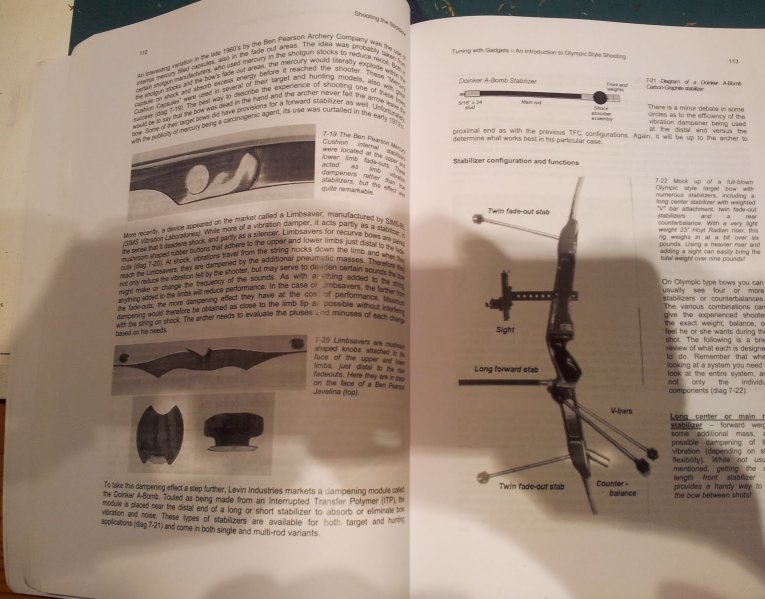
Shooting the stickbow - internal pages

Shooting the stickbow – internal pages

In short I think what makes it a good read is its chapter structure. It  enables you to pick up a copy and read a chapter or two and get something worth while out of it. So if you have a busy life style and find the time very limited it is ideal.

the book  is broken into 4 sections

  • Basic Shooting the Stickbow
  • Equipment – a detailed view
  • Making the shot – theories and practice
  • Memories and musings

Think it maybe of limited use for compound archers as it is aimed at those archers shooting recurve and afb, but I guess the clue is in the title “shooting the stick bow”. I’ve shown this to a number of other archers and everyone whether shooting barebow or longbow have found it of interest. I’ve also recommended it to anyone thinking of either becoming a coach or simply want to expand their knowledge.

Shooting the stickbow - internal pages

Shooting the stickbow – internal pages

Unlike some archery books I have which are pocket-size this is more of a tome, providing a wealth of information, experience and advice. I think it is a massive achievement of the author to produce such a weighty read but still make it easy to follow. The only downside I can give on the book is the quality of some of the photographs that are “showing their age”. Otherwise I would say its a 9 out of 10.

Here are the ISBN number etc I bought my copy from Amazon and received it within a couple of days.

Shooting the Stickbow” 2nd Edition, by Anthony Camera

Author : Anthony Camera
Paperback: 438 pages
Publisher: Virtualbookworm.com Publishing (13 Oct 2008)
Language: English
ISBN-10: 1602642443
ISBN-13: 978-1602642447

Thanks for reading and hope you find this of use.

Buying equipment – more bits and pieces part 3

Ok so this is the third part to buying equipment etc. I hope you’ve found the other posts useful.

Hopefully you or your students have bought the basic bits and bow mentioned in the previous posting. What I want to cover now are things to consider after you have your bow and some advice on keeping it in good working order.

When you get it and afterwards.

Once you have your bow there are a few things worth remembering. Check the bow for damage – may sound strange but just because its new doesn’t mean it hasn’t been damaged in transit. If you have taken my advice you will have gone to an archery shop and tried a few out and they will have shown you how to set it up etc

Check the bow for damage – may sound strange but just because its new doesn’t mean it hasn’t been damaged in transit. Below shows a wooden riser that split after a couple of weeks of shooting.

Damaged riser

Damaged riser

Use your phone camera – yes technology can help here. A camera phone is a great tool for monitoring bracing height, nocking points, possible damage etc.

Protection – bow bag or cases. These come in lots of different sizes and shapes. Hard plastic cases, soft carry all style bags and backpack variants. What ever you choose get one that holds your bow and offers it protection. I have a simple soft case for my trainer bow, but for my competitive recurve I have a hard case with foam padding that holds my bow securely whilst in transit.

When putting your bow away make sure it is dry. I shoot all year round and in all weathers from baking heat to snow (there have been times I’ve shot an arrow and by the time I’ve walked up to draw it, there’s a layer of snow on it) But when you are putting your bow away dry any excess water off before putting it in the case. Then when you get it home open the case and double-check it is dry.

I use a Bazooka case, it’s a case originally designed for fishing rods, but is extendable up to 7 ft, for my flat bow. It means it doesn’t get knocked about in the car.

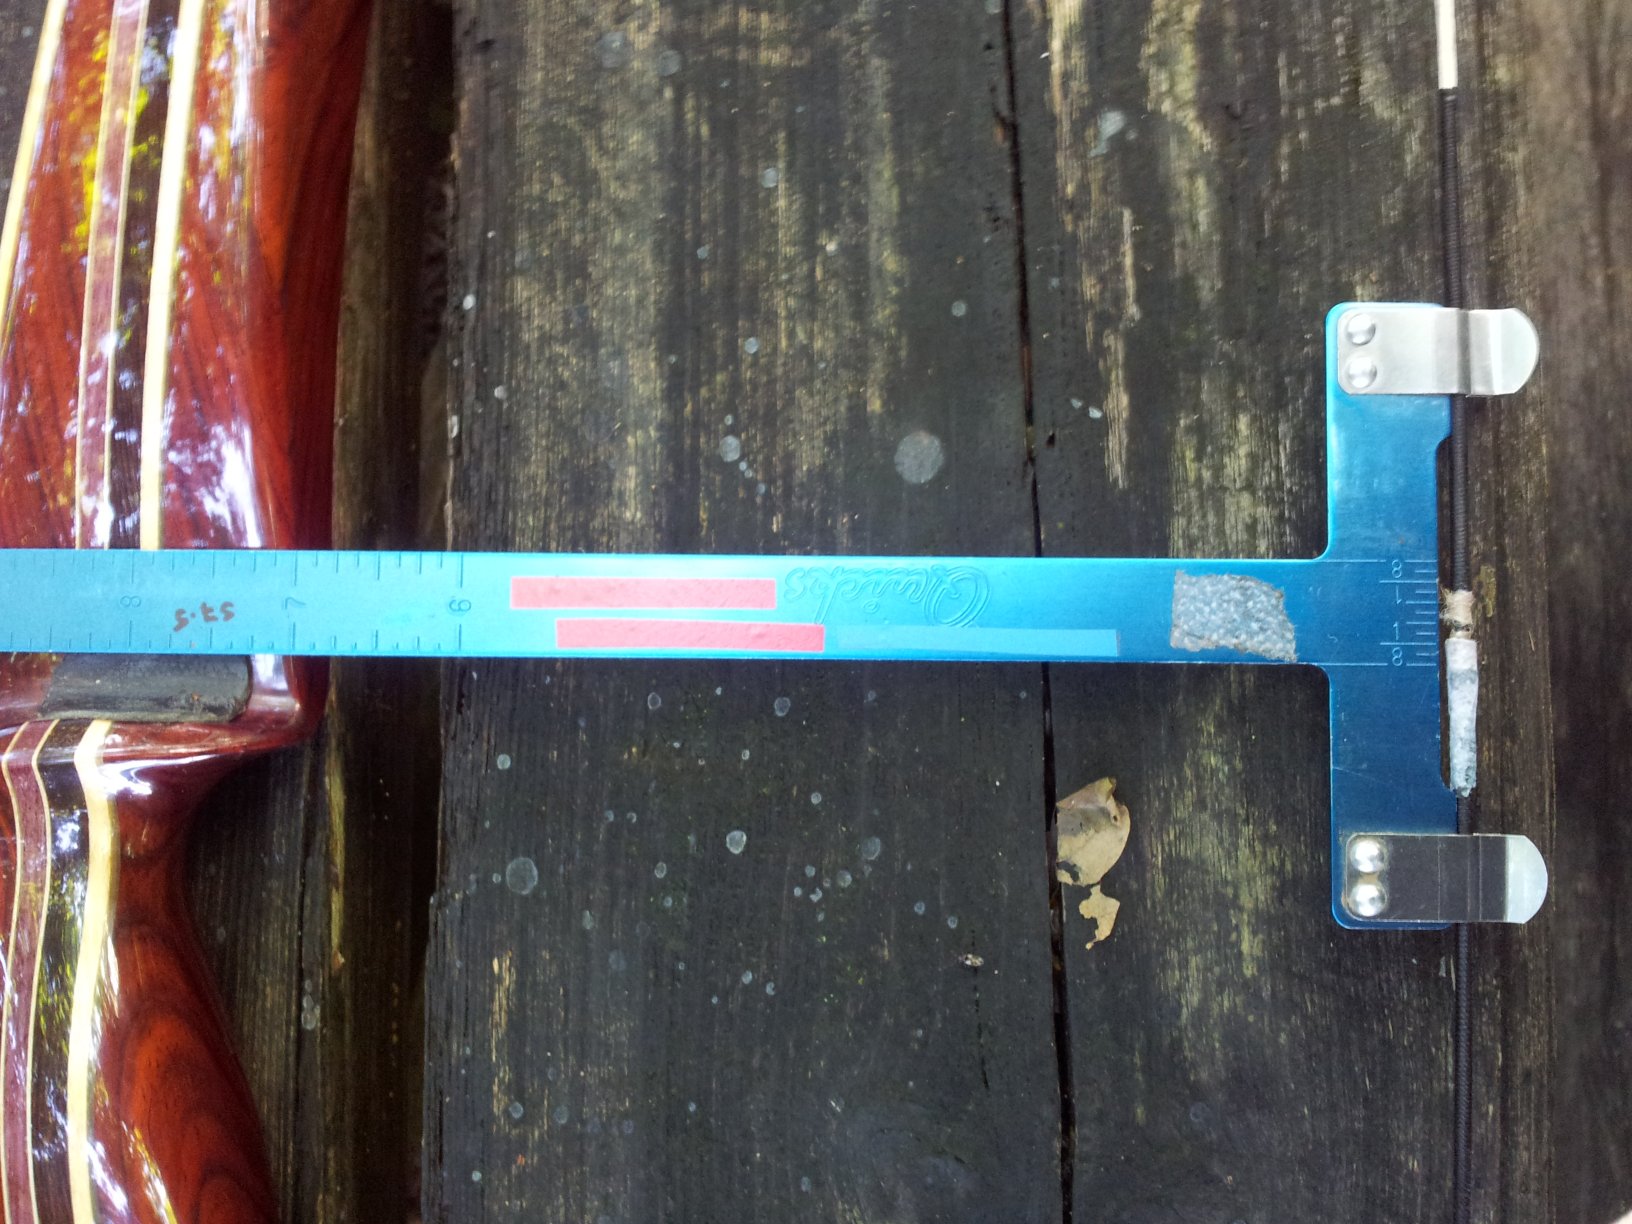
Bracing Height – Check your bracing height for the bow. This can vary depending on the style of bow, limbs etc.  and may change over time as the string stretches slightly, so you will need to monitor it.

Another advantage of getting it from an archery shop is they should check and set this for you when you get it. Make a note of it and better still a photo so you know exactly what it is. Get a bracing rule / gauge.

Bracing on bow

Bracing on bow

String – make sure you get the right length string and some string wax. String wax is often forgotten in the excitement of buying your bow, but is very important as it protects your string and binds the strands together. I wax the string every other time I shoot.

String loops

check for wear and wax

Limbs – Another area that can see wear are the limb pockets.

Limb pocket and bolt

Limb pocket and bolt

It is not uncommon for archers to be a little over enthusiastic when fitting in the limbs and over tightening the bolts or cross threading them.

Limb fitted into pocket

Limb fitted into pocket

This is something to look out for if you are buying a bow second hand. Check the limb pockets aren’t warn or the bolt damaged. Also check the limbs for any scratches or signs of damage along their edge. A good way of doing this is to run a cloth duster down the llimb edge. If it snags on anything then it might show damage on the limb edge such as a split or splinter.

Check for wear

Check for wear

Also check the limb string grooves for any sharp edges or signs of wear.

Ok that will have to do for now. I hope you have found this useful, My plan is do write another one shortly on arrows.

As always, thanks for reading.and let me know what you think