Spin Pin target pins
A while back the guys at Spin Pin were kind enough to send me some samples of their target pins for me to try out and I thought it about time to finish the write up and give my thoughts on them.
I’ve been using their target pins for about 6 months now on my layered foam bosses on the range and comparing them to the more traditional target pins.
First Thoughts
My initial thoughts when they arrived were I quite liked the size and shape as the pin heads aren’t too large. The grip on the top to screw I thought might make it easy to screw the pin into the boss, much easier that the simple push in ones. The plastic also feels robust, and I wondered how they will cope with being hit by an arrow. I know the traditional white pegs shatter if an arrow from my flat bow hits them.
Anyway those were my initial thoughts.

Traditional pin and Spinpin
Post Testing
Having tested them for a longer period of time I find I quite like them.
They are easy to use as the thick thread makes screwing them into the target boss very easy. I thought it might be worth getting some other peoples’ views so at a coaching session I ran a few months back I got a couple of students thoughts on them.
They agreed with me that they were pretty easy to use, with the head shape making it easy to screw in. As one said, it removed the need for brute strength to push the pin in.
Can take a hit
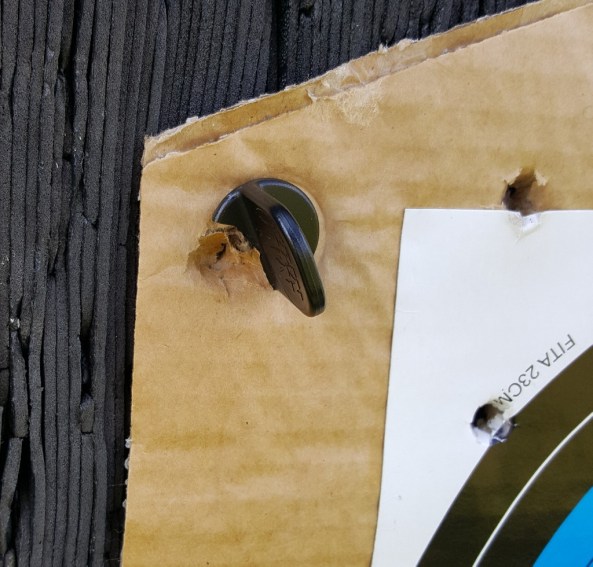
They are pretty tough but they aren’t indestructible if you hit them straight on with an arrow, they will break, but to be fare so would any others.
I like the way you can use them to “tighten” the target face back on by simply screwing the pegs back in.

Simple screw them in
I’ve only found one problem with using these target pins and that is really dependent on how you mount your target faces.
The reason is, if you mount paper faces on a couple of layers of corrugated card, which isn’t unusual to lengthen the life of the target face, then use the pins it doesn’t give much pin length to secure them into the boss, so when drawing the arrows the target can sometimes be pulled off. This isn’t a big problem if you don’t use the two layers of corrugated card or just one layer of card. Also you could simply be a little more forceful when securing the face.
I did write to the guys and suggest they made the pins a bit longer, but as they said that might make them harder to use on other bosses, like straw ones. Also based on my experience if you mount your target faces on a single layer card it’s not a problem.
As I’ve said I have used these for the last few months now and been happy with them securing the targets to the boss. I tend to use 4 or 5 of these pins to secure the cards rather than just a couple with the more traditional ones, but this seems to work well.

secure the target
Most of my tests have been on paper faces mounted on card or on the ProKill24 faces that are printed on a plastic like fabric, so I haven’t had chance to test them out on hessian faces so I can’t comment on their suitability.
I’d had hoped to try them out on one of my bag bosses a bit more but haven’t had chance thanks to too many garden projects. Though they seemed to work fine on the tests I did perform.
Overall I like the ease of use as it takes less pressure to push them into the target boss, I do think making them slightly larger would make them even better. Overall not bad and work well.
Thanks for reading