Despite best efforts I do miss

Shoot Report – National Field Archery Society Championships – May 2018

Archers gathering for the NFAS 3D championships

Archers gathering for the NFAS 3D championships

Sorry all , I have been pretty slow on writing up shoot reports recently as been focusing on the coaching articles for the “Hardest things in archery series”.  I think I have two or three shoot reports to type up, so please be  patient.
Anyways in May 2017 the Organised Chaos team were setting one of the courses for the NFAS 3D championships. If you are interested you can read all about that weekend and the preparation before all of madness here. This meant the 2018 event was the first time we’d got to shoot a 3D championships for a couple of years. Would it be good or bad, only time would tell. Personally I knew I was going with no expectations having only shot my bow a few times in the preceding weeks. Add to this was the chest infection I had been diagnosed with a couple of days earlier, I was just hoping to not embarrass myself, coming home with most of my arrows and get somewhere near the top 10 if I was lucky.
In issue 126 of Bow International Alex Tyler has written a review of the event too.
So what is a 3D championships?
For those not familiar with what is expected at such competitions here is quick a breakdown.
The NFAS 3D championships is annual event, being one of the two national competitions run by the National Field Archery Society. It takes place over the second May bank holiday and can be located anywhere in the country. This year would see over 400 archers in 11 classes travel from across the country to compete. I think due to the timing of the event, distance for many to travel and the booking forms coming out later than normal, there were slightly fewer attendees. I know a few who would normally attend were unable to find affordable accommodation.
All 40 targets on each of the courses are 3Ds, being set at between 5 yards and 65 yards or more. Competitors would shoot 2 courses, one each day. Two course would be set for the wooden arrow classes and two for the metal and carbon arrows. This split allows course layers to tailor the shots for specific classes.
We would be in different woodlands to those used in our last visit, with only a couple of shots in the open. In fact nearly the entirety of the two courses being on the estates wooded hillside, at least for the wooden arrow competitors.
Onto this years event. it would be returning to the Fleet estate outside Plymouth, for the two days of intense shooting and competition, thankfully in good weather. If you are interested, you can read a review of the last visit to the estate here, which as I said was a few years back. Having said it was in good weather, the drive down to Plymouth took ages, with combinations of poor weather en route and accidents causing delays on the motorways.
Some of you may have already read my review of the Premier Inn we stayed at in a previous article not somewhere we will be rushing to return too.
Sharon on Saturday morning, enjoying the sun

Sharon on Saturday morning, enjoying the sun

We, meaning the wooden arrows archers, would be shooting two courses A & B, whilst the metal arrow shooters would be on X & Y. A course was set by Tavistock Company of Archers and B by Toad Hollow. Since Sharon and I were both shooting in the American Flatbow class we’d shoot B course on Saturday and A on Sunday.
Like in other shoots you would be assigned a shooting group on each day.
Saturday 
Saturday morning saw us arrive early to find many others had had the same thought, with the car park quickly filling up.
I have to say I was glad we were under cover for the couple of heavy showers that hit Saturday but otherwise it was a dry event.
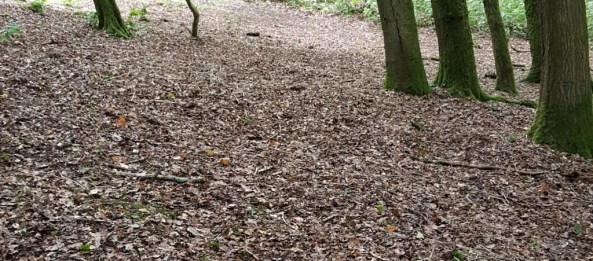
B course would see lots of walking and a sometimes confusing series of paths which crossed one another, leaving you at times unsure which direction to go. The scent of wild garlic sat heavy in the air on Saturday with the woodland floor covered in a thick carpet.
My shooting group would be three people I’d not met before Mark, Liz both shooting longbow and Nikki shooting Flatbow.
I have to state my thanks to the B course layers who had organised a water drop half way round the course at the top part of the hill, which was a great idea and really needed.
B course mini bear (think insert needs pushing back in )

B course mini bear (think insert needs pushing back in  after we’d shot it)

The course was arranged into 3 loops, feeding back to the catering stop on the edge of the field. The three stops and lots of walking made for a slow day and a little confusing at points to get round. Especially where the 3 loops intersected one another. I know we nearly missed the route on a couple of times to targets.
B course - One of the few not set in the woodland

B course – One of the few not set in the woodland

At times it felt the course had been set by different people as elements and shots looked and felt different. Saying this though, it should not be taken as a criticism, there were some really nice shots, that looked good and invited you to take up the challenge.
B course Niki shooting

B course Niki shooting

One of these was one of the longer shots, a downhill bedded 3D elk, which fooled many on its distance.
B course - another 3D hidden in the undergrowth, this time a coyote

B course – another 3D hidden in the undergrowth, this time a coyote

Another well set target would see a 3D cobra set behind a V in trees, proving a good use dead ground.
B course - 3D hidden in the undergrowth

B course – 3D hidden in the undergrowth

In the denser areas of woodland the course layers used the undergrowth to hide a few 3Ds, again making it harder to judge the distance.
I think the one negative I would have about the day would be when we got to catering on our third stop, to find nothing. They had packed up to head back to the admin area where they were providing food for the saturday night. The thing was there were still several groups wanting a break, a cup of tea or like me just to replenish my water bottle.
B course long standing 3D Caribou

B course long standing 3D Caribou

With no catering available groups were wanting to move on quickly, but one of the longest targets on the course was straight after catering. This was a standing 3D caribou target set in the slightly more open and flat area of the woodland. By the time we got to shoot it we had an audience of four groups were waiting behind us. Yes that was quite nerve-racking, especially as many of the group in front had missed it and I was the last to shoot in my group. With encouragement from all my group I fortunately managed to hit it with my first arrow, much to my relief.
Saturday would prove to be a long day for me. Sharon was off course by 4 pm but I was only just walking out of the woods, back to Admin to hand in the score cards at 5:30 pm and I know there were other groups still shooting.
Sunday
After a stormy night and not much sleep at the hotel, we were greeted with a slightly grey day. As it was Sunday would prove to be a warmer and more humid day in the woods. Or at least that was how it felt to me which could have been in part due  to the  course of antibiotics I was on for a chest infection.
As is normal the shooting groups changed, so Sunday would see me shooting, with  Bruno, Sylvia and a friend of mine who I’ve coached Colin. No scores from Saturday had been posted but there was quite a few conversations about how close it was in gents AFB.
A course was set by Tavistock Company of Archers

A course was set by Tavistock Company of Archers

A course set by Tavistock was very different to the previous days, I think partly due to the terrain available to them. Arranged in two loops, with the catering point being the crossover point. The woods felt much more dense at times, with areas that felt very humid on the day and others more open. I’m guessing this is why they made use of the pathways and tracks to shoot off in some areas.
A Course - 3D deer

A Course – 3D deer

Like B course the day before there was a  water drop  for people to replenish their canteens, though personally I think a  water drops on the far side of A course would have been more useful for archers, as the one they had was quite close to catering, which seemed a bit of a waste. I know how hard setting a 3D course is, along with how thankless it can be trying to please everyone one.
I think Tavistock did set some very nice shots. The long bedded elk down an avenue of trees, was framed well and provided a challenging shot. Another was the standing bear, where we all misjudged the distance, falling in the lower body.
The dense woodland offered a couple of well set shots, such as the velociraptor 3D appearing to be walking out of the undergrowth. This was our second target and not an easy one to hit.
Bruno about to shoot the 3D dinosaur

A course – Bruno about to shoot the 3D dinosaur

I do feel there were a few shots that could have been tweaked or improved with back stop bosses or nets to save broken arrows. There was a skinny turkey side on behind a tree which was not only hard to see but hard to hit. Another one especially was the cobra 3D or lost arrows in the field on the uphill 3D ram. I think we must have spent 10 minutes searching for arrows on that target, and though we managed to find 3 other peoples arrow, none of ours were found.
A course - 3D frog

A course – 3D frog

To be fair, the course flowed well with no hold ups for us, meaning that Sunday would be a shorter day and it would see our group finishing shooting and walking off the  course by 3pm.
I didn’t feel that I shot as well on the Sunday, though I have to say thank you to Colin who was charged with the responsibility of keeping my spirits up and reminding me to take my antibiotics.
Though we finished and managed to get off the course early, other courses took longer to come in. The prize giving was delayed by the raffle and auction of bits including a couple of bows. Though I’m not sure if the auction of the 3Ds and 3D inserts was well received as it seemed to go on for ages.
One thing with the delay in prize giving was it gave me the opportunity to chat to a few people about coaching ideas and to have a good natter about life, the universe and archery.
Sharon shot really well, winning ladies American flatbow and despite being medicated up I managed my best ever position, coming second in gents flatbow. Not a bad result for Briar Rose club.
Mr and Mrs Jones, me in second place and Sharon first

Mr and Mrs Jones, me in second place and Sharon first

Thankfully the drive home on the Monday was not so tiring or long with decent weather and no hold ups. Though if the event ever returns to that location I know we won’t be staying at that Premier Inn again.
Thanks for reading.
Sharons bow and arrow set up

Quick tip on brace height check

Showing the brace height and cresting

Showing the brace height and cresting

We all know how important it is to have your bow setup right and ensure it is at the correct brace height. I wanted to offer a quick tip to all archers out there for checking your brace height on your bow, which doesn’t involve having a rule.

When I made up the last batch of arrows for Sharon, I crested them in colours to match her fletchings, are pink and orange.

Close up of a couple of finished arrows

Close up of a couple of finished arrows

Before I started I measured the brace height for her bow and made sure that where the two colours met on the arrow, it would be in line with the light coloured strip on her bow, when at the correct brace height.

I then edged the divide between the two colours with a black band.

One of Sharons' finished arrows with black edging

One of Sharons’ finished arrows with black edging

Since this band coincides with the white band on her the bow riser, when the bow is at the correct brace height. It means she has simply to nock an arrows and check the banding on the arrows matches up with the light stripe on her bow and she will know her brace height is correct.

Sharons bow and arrow set up

Sharons bow and arrow set up

It is a simple and quick method that does not need a bracing rule, just a little bit of preparation when making your arrows. You could easily adapt the idea with any arrows, by putting a mark on the arrow to coincide with the correct brace height.

I hope this helps and thanks for reading.

Hardest lessons to learn in archery – Why does my arrows comes off the rest

I’ve had this question come up a couple of times recently, so I thought I would put a quick reply up now in an attempt to help people out.
“Why does my arrow keep flipping off my rest or bow when I draw up?”
Okay there can be a few reason why this can happen, so I’m going to pick out the three most common ones.
  • Twisting of the bow string.
  • Throwing your bow arm.
  • Damaged rest.
Twisting of the bow string is probably the most common of all reasons the arrow flicks off your bow and occurs normally about mid draw. when you are drawing up.
When you are starting to draw up your hand is gripping the bow string, as you draw the string back you twist or rotate the string, this twisting results in the nock moving and arrow flicking off the rest. So if I explain this from a right handed archers perspective. A right handed archer with the bow held in your left hand, will draw back the string and in the process will twist the string effectively rotating it counter clockwise. This rotation is what causes the arrow to flick off the bow.
A solution to this is to ensure you are not gripping the string too tightly, try relaxing your fingers, before drawing up.
Throwing your Bow arm – Sometimes when people draw up, they end up “throwing” their bow arm, this can be due to you drawing up too quickly or enthusiastically. As you draw up you move the bow arm quickly and then abruptly stop when at full draw, however, the momentum flicks the arrow off the rest. I’ve seen this quite often with young children who are quite excited and energetic in their draw cycle.
The solution is to slow down your draw sequence, being more controlled in the draw, with less rapid movements.
I have also seen both of the above examples being as a result of the archer fighting the bow in some way, possibly because they are over bowed or not comfortable in their draw technique.
Hoyt rest

Hoyt rest on Sharons’ old bow

Damaged Rest – If you are using an arrow rest on your bow it is possible that the rest has become damaged and is no longer holding the arrow on bow. This problem isn’t that uncommon especially if you are using something like the Hoyt plastic super rests.
Close up of Hoyt rest

Close up of Hoyt rest

There is nothing wrong with these rests and I use them on my beginner bows and Sharon used to use these rests on her bows and would often replace them, sometimes in the middle of a competition if she saw it was wearing or damaged.
For this reason it is worth carrying a few spares in your quiver just in case  you need to replace them.
Okay, so these are some very quick tips and advice, I hope this helps and thanks for reading.