In this week’s episode I delighted to have as my guest Chris Mussell. Chris is a highly experienced archer as well as being heavily involved with the Scouting organisation in the UK, specifically with respect to archery.
In the episode we explore how scouting approaches the challenging task of coaching young people but also training scout leaders to enable them to coach young people.
As always the episode is available on Spotify and Amazon music.
I feel this episode provides a really good insight into how the scouting organisation plans, runs and controls the rules of shooting for scouts and leaders. There are obvious similarities to National Field Archery Society events but also key differences, most noticeably the target selection. The scouting prohibits the use of any animal or human like targets, so no shooting zombies or 3D targets.
Of course we do tangent at times into other archery related topics, including chats about past events and campfire chats after festivals.
Thanks for listening and I would like to wish you all a fantastic Christmas and New Year.
Firstly a huge thank you to all who have offered feedback on the first shooting style video. Taking onboard this feedback I’ve produced another video on an NFAS shooting style. This time it focusses on Barebow class.
You might recall back in November I released the first of these on Traditional Bowhunter
If you enjoy the content, please hit the Like button and consider subscribing to the channel.
Most of all remember to enjoy your shooting and as always thanks for listening, watching and supporting.
As always thanks for reading, listening and support this site. Enjoy your archery.
Several years ago I wrote a review of the Leatherman multitool I’ve been using for years. This is an update of that review. I’ve owned a few different multi tools varying from the bargain basement ones that come free with a torch at a service station, to the more expensive Leatherman models.
I’ve found them a useful addition to my archery belt and I’ve used them for camping, hiking and even skiing. Pretty much every scout leader I know carries one of these tools on a camp.
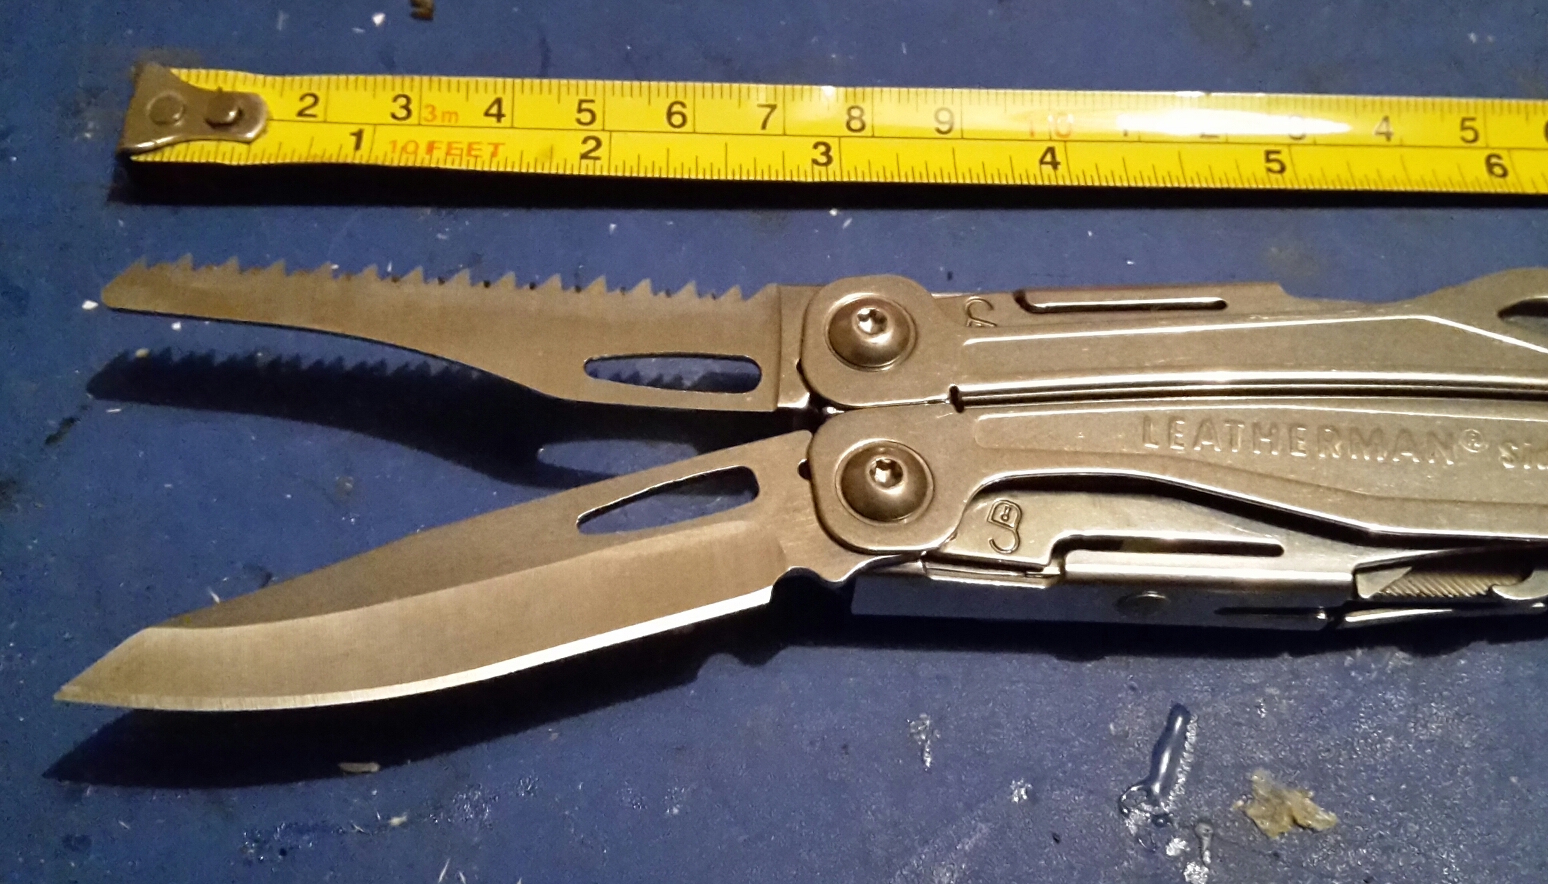
The two I have are the Wingman and Sidekick. Essentially the two are nearly identical and a full breakdown of the different features are shown below. The only real difference is the Sidekick has a small saw blade instead of the scissors that can be found on the Wingman.
Uses in the field
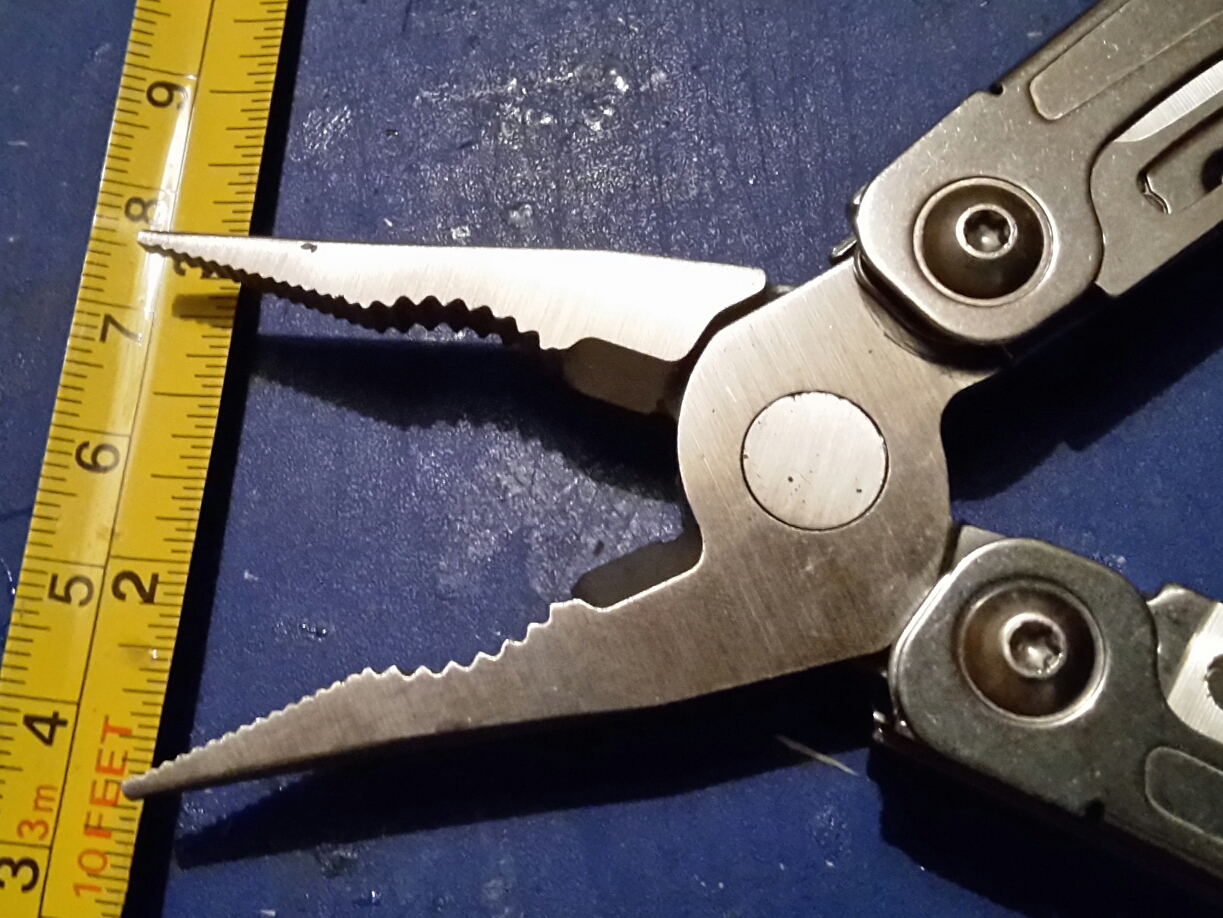
I’ve used the pliers countless times for extracting arrow points of piles from targets after the shafts have snapped in the boss, 3d targets or more often trees and need removing. A sharp knife is always useful if you spend any time outdoors whether it be camping, walking or archery. Quick note here is I wouldn’t use the blade to try and cut a wayward arrow from a tree though, as whilst sharp I would expect the tip to snap under the pressure. For removing of arrows I use an old flat headed screw driver that I have in my quiver.
It’s worth remembering that no matter how good a multitool is, it is by it’s very nature is a compromise, the pliers will never be as good as a true pair of full pliers.
The wingman comes with a small pair of scissors which I’ve found surprisingly useful for archery, when fitting servings etc.
The sidekick comes with a small saw blade, which isn’t going to chop down any redwoods but I have used to saw through branches of about an inch thickness with ease. For that reason I tend to have the sidekick to hand when camping or working in the woods. I’ve also used it to make impromptu walking sticks.
Tools breakdown
Here is a quick break down of the tools, both are made from stainless steel, are pocket sized and covered by the Leatherman 25-year warranty. The WINGMAN has these tools
420HC Combo Knife
Bottle Opener
Can Opener
Medium Screwdriver
Package Opener
Phillips Screwdriver
Ruler (1 in/2.54 cm)
Small Screwdriver
Spring-action Needle nose Pliers
Spring-action scissors
Spring-action Wire Cutters
Wire Stripper Wood/Metal File Measurements: 2.6 in | 6.6 cm (blade length) 3.8 in | 9.7 cm (closed) 7 oz | 198.4 g
SIDEKICK has these tools , and mine came with a Carabiner Bottle Opener Accessory.
420HC Serrated Knife
Medium Screwdriver
420HC Knife
Bottle Opener
Can Opener
Phillips Screwdriver
Ruler (1 in/2.54 cm)
Saw
Small Screwdriver
Spring-action Needle nose Pliers
Spring-action Regular Pliers
Spring-action Wire Cutters
Wood/Metal File
Measurements: 2.6 in | 6.6 cm (blade length) 3.8 in | 9.7 cm (closed) 7 oz | 198.4 g
Workmanship
The workmanship is good and the pivotal joints haven’t slackened off much after 10 years of use, which I have seen on cheaper multi tools. The finish on the back of the Sidekick serrated blade is a little rough which you notice more when folded up but that is the only criticism I have. The rolled metal handle makes using the pliers more comfortable in the hand, compared to some cheaper models you can find on the market.
I now make a point of always carrying one of mine when out and about.
So if you are looking for a Christmas present I’d say either would be a good buy and addition to a kit belt or pouch. If you are looking for something a bit more then have a look at what I think they call the expedition range.
If you like this content and would like to see more reviews then please let me know, either here on my YouTube channel. As always thanks for reading, watching and support.