Some thoughts on the first bits and pieces a new archer should buy

Quick break from my series on target panic to revisit a topic which I think will be of interest to many.

Several years ago I wrote a post offering advice on what equipment newbies should consider purchasing, before buying their first bow. Since I have been working with several new archers in the recent months I thought it a good time to revisit this post and update it where necessary.

As a coach I often get asked by my students about buying a bow. How much do they cost? What should I got for?  Where do you recommend I go?  I’ve seen one on E-Bay is it any good? I always reply by saying wait a few weeks or even a couple of months before you buy one. In that time use the club equipment for until you have a better idea of what is suitable for you.
But sooner or later your students will want to purchase their own bow (which is great don’t get me wrong) but there are a few things that might be worth getting first. So I have put this post together to offer some thoughts.

First things for any new archer to buy (before a bow) should be
Whistle – What a whistle? What’s that got to do with archery? Well put simply it’s for safety calls and is a necessity for insurance on some club sites including ours. All members of the NFAS should have a whistle on them so they can signal if necessary.

A tab or glove of their own. Normally I recommend a beginner starts with using a tab to protect their fingers. As they progress I have them trying both a tab and glove, along with trying different sizes and shapes until they find something they prefer. Recently I’ve found several students opting for a glove which I think is partly due to the colder weather.

This is the single thickness tab

This is the single thickness tab


Personally I think a tab is best, though it took me ages to find one that I was completely comfortable with. I feel tabs are easier on their fingers and promotes good finger position on the string.

Quiver, you can pay a small fortune for some quivers, but when you are starting out go for something simple. So long as it will hold 4-6 arrows and is comfortable to carry on your belt it’s a winner. Quick note about back quivers here. I’ve tried back quivers, several in fact and never found one I was happy with so have stuck with a field quiver. I know some people  love them but for your first quiver, keep it simple.
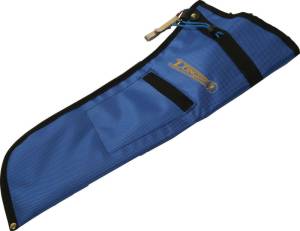
simple quiver image

simple quiver

Some quivers will have a pocket or pouch on them which can very be useful for holder a whistle, stringer, spare string.

Top Top – pick up an arrow tube to store arrows when not in quiver. I carry 3 or 4 arrows in my quiver and the rest are in an arrow tube on my back. Safe, dry and there if I need them. You can use an extendable poster tube, which are cheaper, just make sure you drop some foam in the bottom of the tube to protect it and stop arrows puncturing the plastic. 

Rob trying to judge distance to a shot

Rob trying to judge distance to a shot

An arm bracer or arm guard that fits. What I mean is it doesn’t fall down the arm or is so tight it cuts off circulation to your arm. Like quivers there are loads of different designs, some that go all the way up the arm, others that only cover the forearm. Some are plain others are covered in intricate designs carved into the leather. At the end of the day function is more important, so get one that fits, works and you like.

Arrow puller, while not the most glamorous of archery elements they do makes life easier for drawing arrows, allowing you to grip the shaft more easily, especially on cold days.
Arrow rake – no matter how good you are, sooner or later you will be needing one for finding those arrows that fall short (a cheap decorating roller can be used, once modified for the purpose )

What kind of bow should I buy?

I will cover this in more detail in a separate post but what I will say is in my opinion for a first bow the most sensible option is the take down recurve practise bow.
They are relatively cheap (£55-£75 depending on where you get them), so if they don’t stick with the hobby it’s not such a huge investment. Also you might be able to pick one up from club member who has progressed. The advantage of a takedown is the limbs can be upgraded to heavier poundage as archer develop their strength and skill (I did this after a few months myself, with some shops giving a discount if you trade your old limbs in). Worth noting that not all limbs fit all bows, but I will go into more details in a future post about fittings and ILF bows (International Limb Fittings).
I have found the bows are forgiving to use which is what you want as a beginner.
Such bows come in a vast variety of sizes, shapes, poundage so good for all abilities, heights, draw lengths etc. so are easy to find one suitable for all shapes and sizes of archer.
As I said I will cover this in more details in the next post.

Thanks for reading

Drawing arrows – sounds simple, but is it?

How to draw an arrow, surely that is pretty easy? Just grab it, pull and out it pops. Simple right, after all it is one of the first things you learn when you start archery. Isn’t it?
Back in 2012 (yes I have been writing this blog that long !!) I wrote an entry on the method of drawing arrows and following a few discussions I thought I might revisit it along with providing an update for it.
As with everything there are numerous ways to accomplish a task. Some will be the right or preferred way and no doubt there are several wrong ways to do things. Just look on YouTube and you’ll see a dozen different views. This is the same with pulling arrows from the target, whether this be a 3D or foam boss. In this post I am going to go through the process I recommend to my students when they start.
So before I start I’d like to remind you these are my views and personal advice.
There are a few things to remember before you draw arrows.
  1. First off, its important that all archers whether newbies or experienced get to  see where their shots have landed in the target. If nothing else it provides them with feedback on how they are doing.
  2. Check it is okay for you to draw the arrows as some archers prefer to draw their own arrows.
  3. If in a competition, ensure those scoring have finished noting down the results. In fact you shouldn’t touch any arrows until the scorers have marked the score cards. Most organisations have this in their rules as it prevents arguments over whether the arrow was scoring before being touched.
  4. Make sure no one is standing in a location that they may be hit by the arrow as you draw back.
I must admit to cringing sometimes when I see archers pull arrows. Some people grab them and just pull without considering what might happen or could go wrong. I’ve seen carbon arrows snap in an archers hand, slicing their finger open or wooden arrows bending into a banana or snap as someone is a little over zealous when drawing them. So my first tip is slow down.
Drawing arrows badly

Drawing arrows badly

When it comes to actually removing the arrow from the target, then can I suggest the following.
Never grab the arrow from the end by the nock and fletching as shown in the picture, as it may well result in a bent or worse still broken arrow. You often see archers pull arrows like this because they are unaware of the potential problems that might occur, especially with wooden arrows. Maybe they are used to drawing carbon arrows that are more resilient than wooden ones. The thing is any arrow can break and I’ve seen more serious injuries when carbon arrows break than any other. I’ve also seen several annoyed archers when they see their prized wooden arrows snap because of a lack of care.
Don’t get me wrong there is nothing wrong with carbon arrows, but you need to remember whether carbon, wood or metal,the material can brake. When carbon breaks it can result in razor sharp edges.
The other thing to consider is you don’t know if the arrow has impacted on metal ground pin in the target or possibly a lost arrow point.
For this reason I always advise you  hold the arrow at the front end nearest the point. This gives less chance for the arrow shaft to break or bend.
Then pull back in a steady even draw. Also there is nothing wrong in asking for help if you find you can’t draw the arrow on your own. Some foam, 3D targets are very hard to draw arrows from.
I always suggest when drawing an arrow you avoid using your thumb on top of the arrow shaft as this can lead to you expending downward pressure and increase the risk of bending the arrow., as shown in image below.
gripping arrow

Gripping arrow without using your thumb

The method shown in the picture is the best way I’ve found. Grasping the arrow with the fingers of one hand and with your other hand bracing target. This grip is sometimes referred to as a gorilla grip as it does not use your thumb.

Drawing arrows

Drawing arrows with one hand on the boss to steady it

This method allows you to brace the target with one hand preventing it moving. By holding the target with the other hand you can judge how stable it is. I’ve seen archers go to pull the arrow and the boss or 3D target fall on them as it wasn’t secured or stable.
Ideally once the arrow is drawn it should go directly into a quiver or on the ground. Try to avoid putting arrows on top  of the boss or leaning against target as they are easily lost when they roll off the back of the boss or forgotten.
Some people may use an arrow puller to give them a better grip on the arrow. These can work pretty well in most circumstances but can slip in wet weather. I would say it is worth investing in an arrow puller or grip as this gives you greater grip on to the arrow. In the case of carbon arrows it also reduces the risk of getting carbon splinters. as they offer a level of protection to the archers hand.
Last piece of advice I would like to offer is to put your bow down somewhere safe before you start drawing arrows. This may seem obvious but you will be surprised how often people lean them against the 3D and suddenly discover their bow is falling over as they draw the arrows.
I hope you find this useful, let me know your thoughts .
Thanks for reading.
3D Deer between the trees

Continuing the New Year goals

The woods

The woods are calling

In my last posting I wrote about the setting of New Year goals and how you could start to monitor your progress as you develop in your archery life. In this post I’d like to take this a little further and explore some general advice along with some metrics beginners or experienced archers may consider suitable.

Poor equipment = poor shooting

First thing you can do is to get your equipment right, your bow, glove, tab, arrows etc. Now this doesn’t mean going out and spending a small fortune on the latest carbon arrows of only 6 grains per inch or new bow limbs that promise to launch your arrows even faster. It is about getting what you have working the best it can. As my old coach told me “Learn to shoot the bow you have.

Every archers knows that having confidence in your kit helps in your shooting. If you are worried that the bows not performing or just ignorant of possible problems, it’s unlikely you’ll be consistent in your shots.

With my coaching hat I’d like to give you an example of how not knowing your kit can have an effect on your shooting and make you doubt yourself.

Many years ago I was asked by a newly signed off archer why he couldn’t get a grouping at a distance past about 20 yards. So we wondered down to the range and I got him shooting at a few distances, asking him to shoot each arrow exactly the same, adjusting just for the distance but not for the flight of the previous arrow.

His form was fine and his bow set up was correct with the appropriate brace height, etc. I noticed his line was fine but some arrows flew high others low. He’d bought the wooden arrows from a local stockist as he’d not yet started making his own. I asked if he’d checked the mass weight of the arrows. He hadn’t, so we dug out my grain scales and measured them. When we did we discovered that of the 8 he was shooting there was approximately 90 grains difference, with the other 4 talking the range up to over 100.

Grain scales with sponge

You can’t hope to get a consistent grouping if all your arrows are different weights. This is why I spend time matching the arrows I make, I try to match arrows both in mass weight and spinning for mine and Sharon’s bows. (Quick call out to Marc at longbow emporium for a great matching service in arrow shafts)

QUICK TIP – A useful tip when setting up your bow is to use your mobile phone camera, to  photograph your brace height or button settings. This way you have a pictorial record you can use when setting up your bow, arrow rest, replacing the string etc.

Photo of recurve set up

Photo of recurve set up

Club ground – the Good and Bad points

There is no doubt that practise is important, in fact it is very important. For this reason I think it is worth mentioning the merits and flaws of club practise grounds and trying to use it to judge your progression and development.

So the good part of having a home course is pretty obvious, it gives you a practise area that is relatively static and unchanging day in day out, meaning you can judge your progress, week on week. You can go back to a target again and again until you get it right.

I always remember in my first club, where there was a deer 3D that I always struggled with and I would go back and shoot it again and again.

3D Deer between the trees

3D Deer between the trees

The downside of practise on the same ground can be you end up shooting targets on a sort of autopilot as you’ve shot it so many times before you don’t appraise the shot as you would or should if presented for the first time at a competition. In essence you shoot the shot from memory and in turn it becomes too easy, as you don’t spend the time to read the ground or judge the shot.

One technique you can use to keep the course shots fresh is to shoot 3 arrows at all the targets, even if you hit with your first. So for an adult you would shoot, one from the red, white and blue pegs. This is a technique I have used for several years at club grounds and found it works for me. It forces me to keep testing my distance judgement and makes me adapt as I’m moving from one peg to another. It also builds your stamina in your muscles as you are shooting more arrows. I’ll cover more about physical fitness in my next article.

Competition Courses and Base lines

Ok so you have been shooting at your club grounds and you now want to go out to try other clubs and enter a few competitions. Maybe there is a group of you and you’ve been to a few shoots but not sure how you are doing. Thing is how can you judge how you are doing when you are at different courses? Sure you can look at your score and if it’s higher than your last shoot you are improving right? Well maybe, maybe not.

Due to the nature of the NFAS, the club courses you shoot change over time, year on year.  In fact this is somewhat expected by archers. A club that doesn’t change its course can often receive negative comments from some like “It’s just the same as last time” or “They haven’t bothered to change the course from last time we shot it”.

On courses that do change you can shoot the course one day and score over 500, but the next time you return to that club, a few months later, it might be a different story with a changed course. There will be different targets and distance, the result is you might score more or less. This means it can be very hard to accurately judge your own progress when you revisit a clubs grounds.

So what can you do, to judge how well you are shooting?

As courses change it can be a good idea to identify some kind a base line for comparison. One method is identifying one or two people, ideally shooting in the same class as you and track their scores in comparison to yours.

A second method is keeping track of the scores of the archers who came in first, second and third in your class, this can help to give you an idea of what is possible. Often the placings and scores are posted on the hosting club or NFAS website.

One very important point to remember here when talking about scores and is equally important, whether you are newbies and experienced archers alike is DON’T get disheartened when you may have scored 300 and the winner scored 600 plus. Check the scores of other people, and the 3 placing. The winner might have got 600+ but the person in second might have just over 500 points. The winner might be on top form and had a personal best, so it is important to try and get the bigger picture. I can assure you this method of tracking can help and Sharon always looks out for the gents scores in American Flatbow when at a competition as there are more male archers in the class than female. She used to track the gents in Hunting Tackle when she shot that style.

A third method is to track your average points score, based on your total score divided by the number of targets. When I first started shooting several years ago my aim was to get an average per target into double figures and being really happy  with my average started going up from 8 points to 9 and then 10. When I broke 400 on a 36 target course, it was great. Several years later, with a lot of practise and shooting day in day out, I now have different objectives. I hope to get 16 point average on a course. The advantage of using this method is it can provide you with a baseline comparison of progress for a 36 target or 40 target course.

I have learnt that these averages will vary dependent on the club I’m shooting at, as now with a little more experience I know that some club courses are more challenging than others. Other facts like the weather on the day, or whether it’s a slow day with lots of holdups all plays a part.

The important thing to remember and this will sound a bit corny so sorry in advance. Your life in archery is a journey and it takes time. You will have good days, you’ll have great days and you will have bad days, just don’t rush it or beat yourself up over it.

Last Tip

Don’t worry about what others are scoring. What! You just said for me to track the scores of first, second and thirds! Or work out my averages. Yes I said that, so you can get an idea of how tough the course was, but while you are shooting forget about it.

Go out and do these two things

  1. Enjoy yourself; you are out in the woods, shooting a bow, hopefully in good weather and company.
  2. Shoot your shot when on the peg, with your bow. Don’t be thinking about anything else, just your shot.

One of the reasons I love archery is it offers you the opportunity to compete against myself, yes you can compete against others true, but for me I’m there to shoot my bow the best I can and to make the best shot I can. If my arrow lands where I want it to, whether it’s the top scoring area or not, I’ve made my shot.

Ok, so in the last article in this series I am going to be looking at resilience physical and mental, along with shooting form and technique.

Thanks for reading