Source: How to become a Better Archer
Some really good, simple advice in this video from 3D Archery with Gregory Richards on working on a system for archery and love the comment about the Gremlin.
Source: How to become a Better Archer
Some really good, simple advice in this video from 3D Archery with Gregory Richards on working on a system for archery and love the comment about the Gremlin.

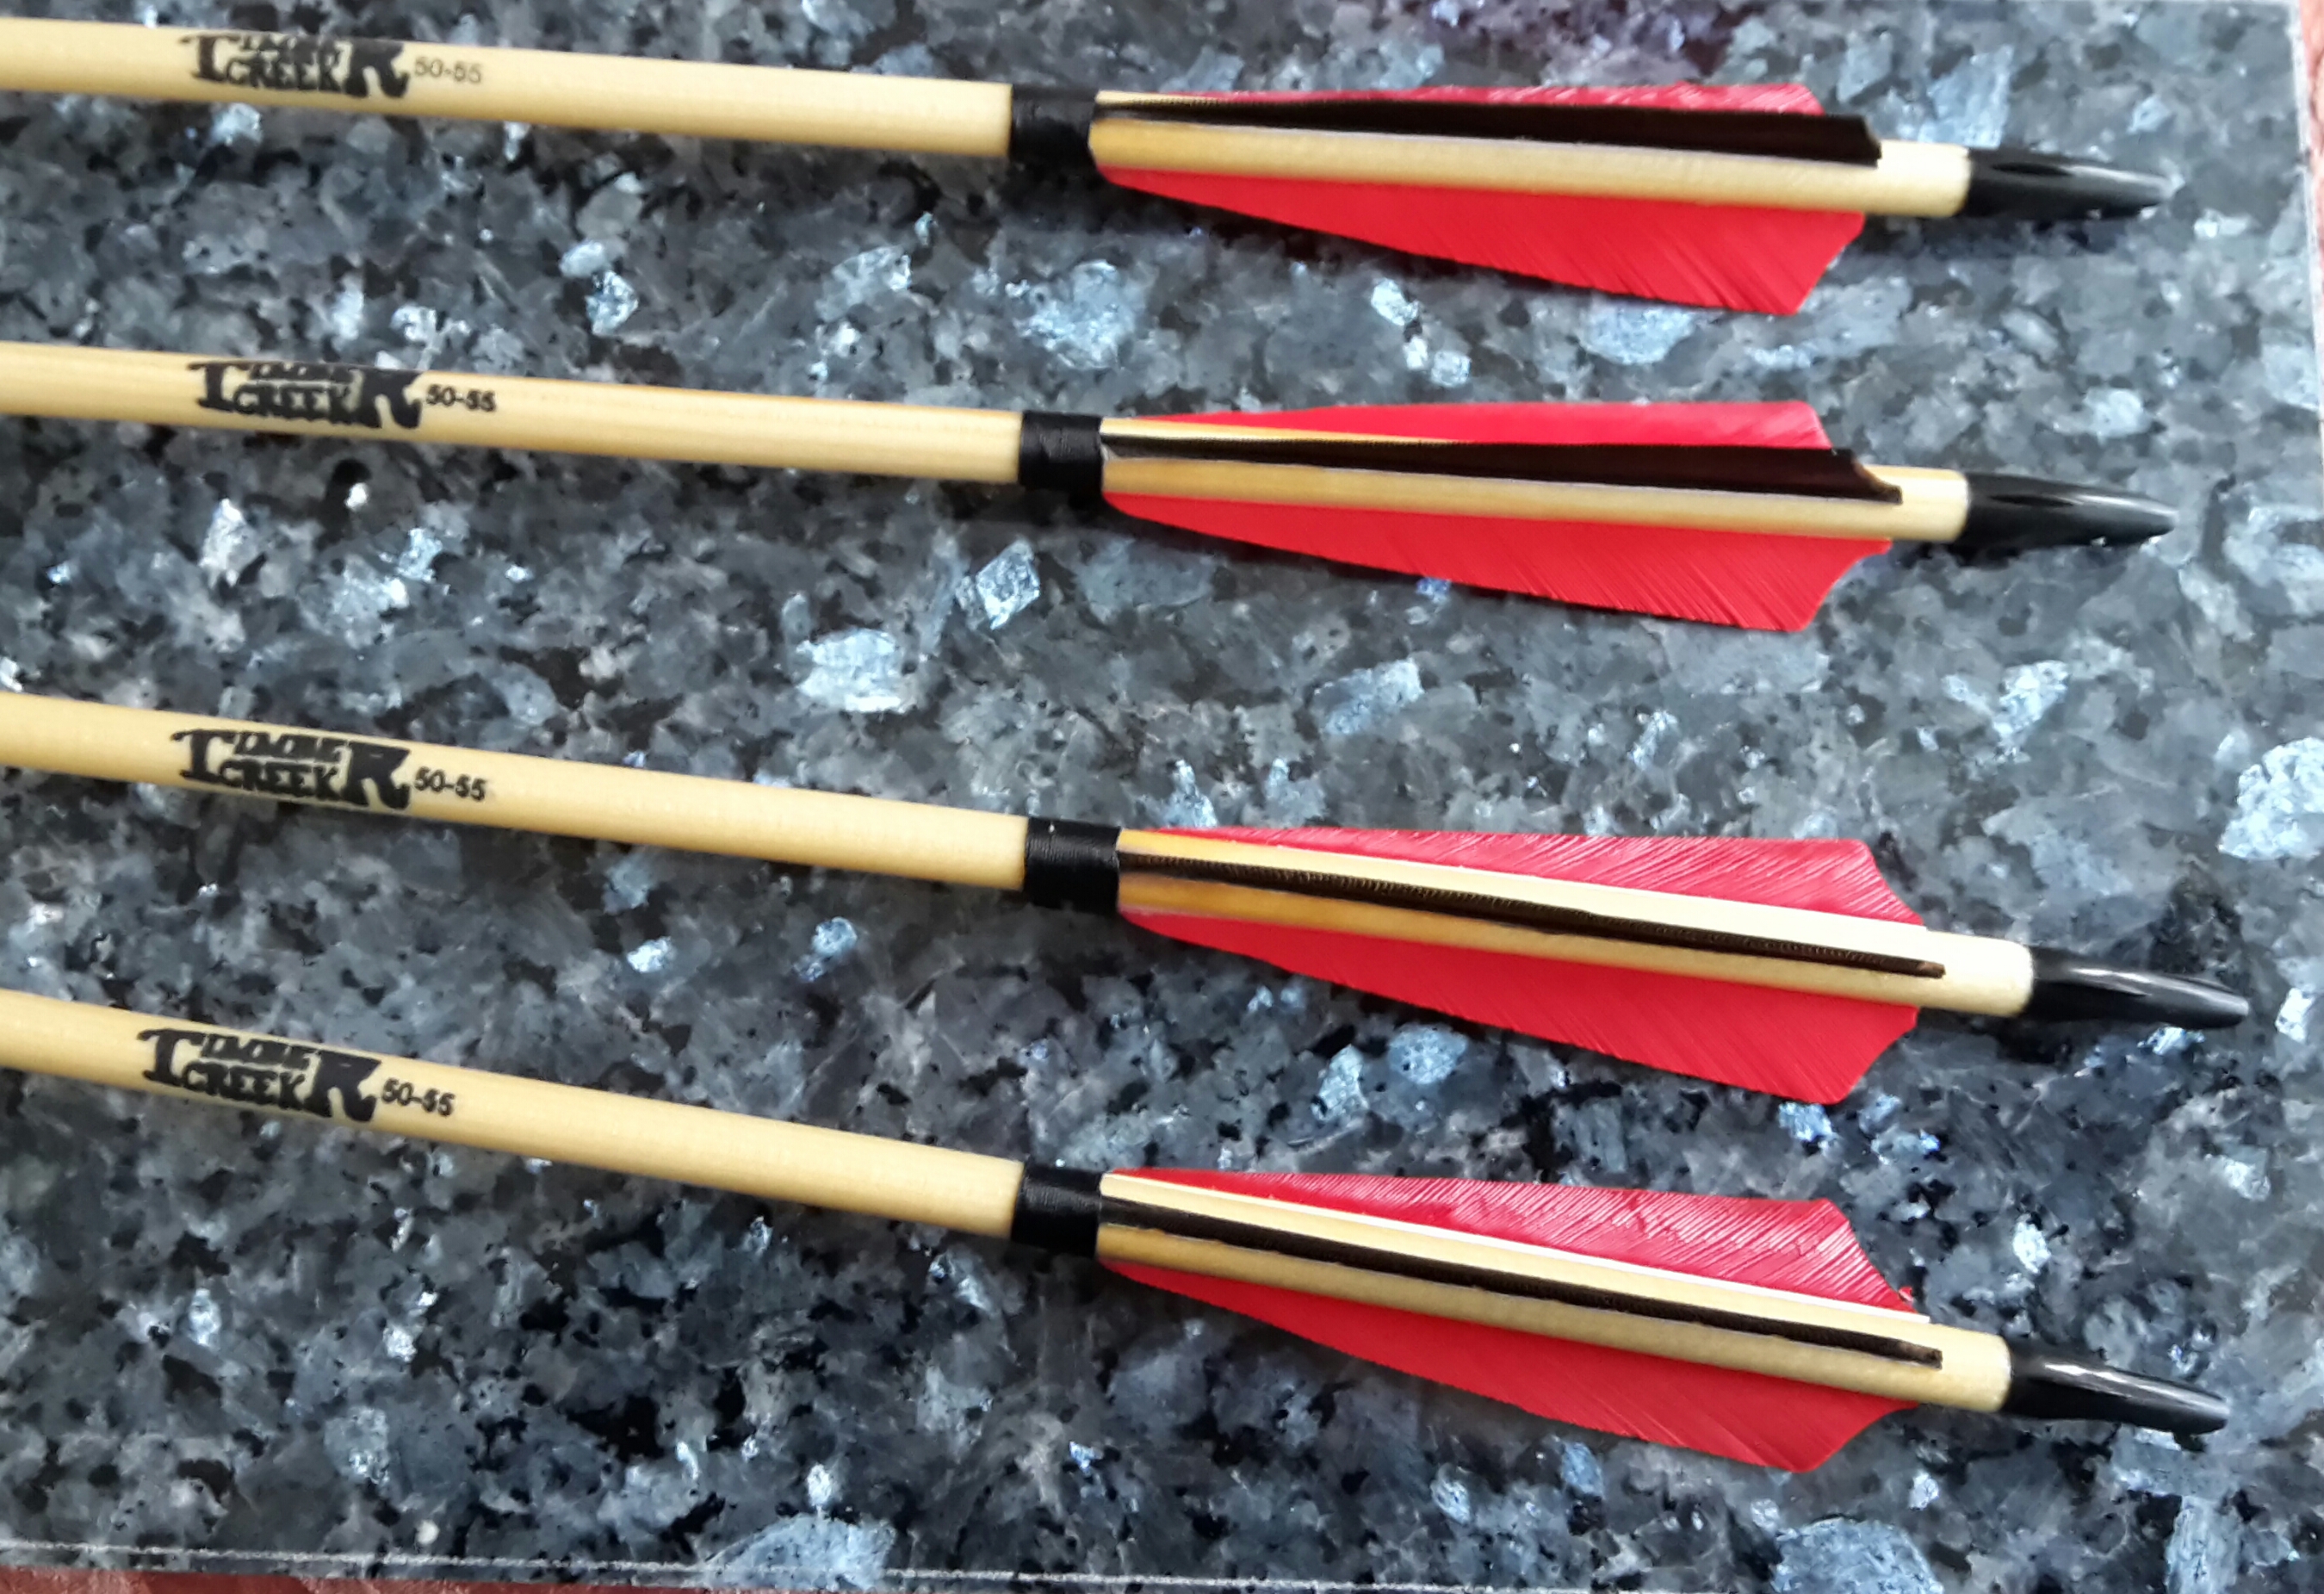
Timber Creek Arrows

Close up of fletching and nock
Having weighed them the six arrows come in 30 grains variance which is pretty impressive for unmatched out of box.
The piles are 100 grain field point which will be fine for most but I prefer an 80 grain.
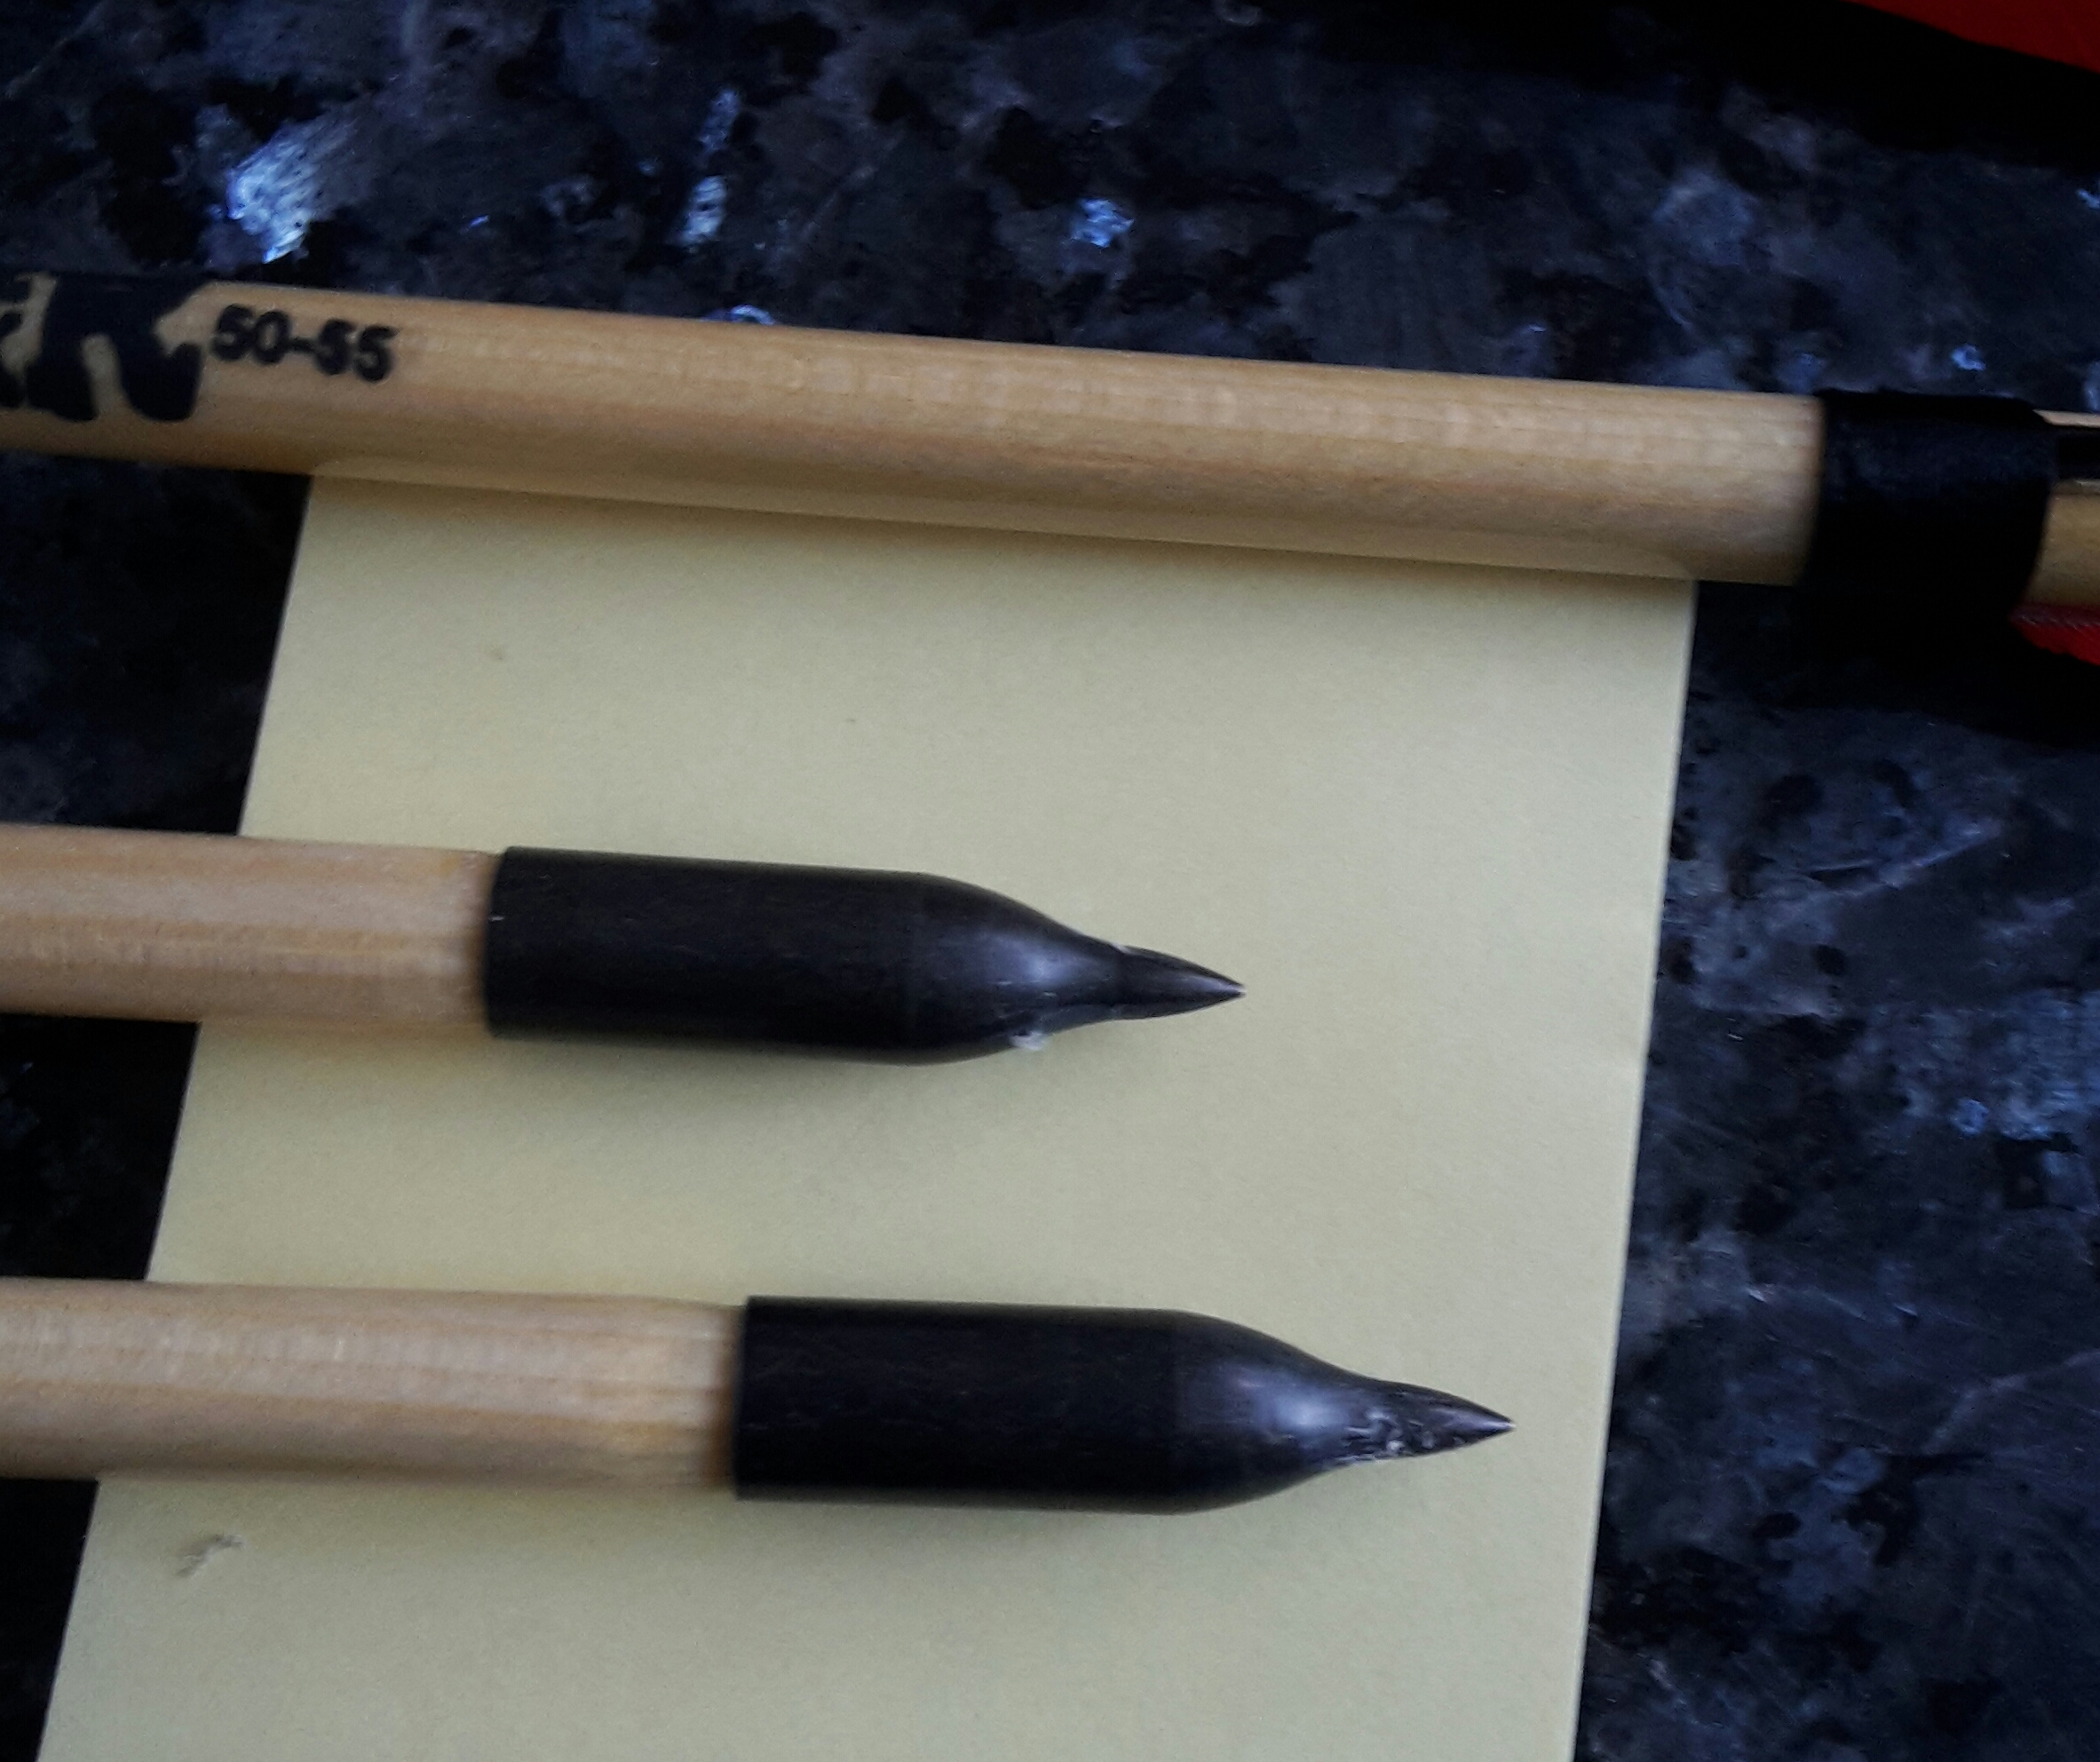
100 grain piles
Out of the box they are 32 inches in length and come pre – piled and ready to shoot. Only thing I’ve noticed is the piles on two are very slightly proud of shafts, probably due to the shafts being slightly less than an 11/32. So if shooting a bag boss they can snag on the fabric. In fairness this is not an uncommon problem with wooden shafts and one I’ve encountered when making my own.Initial goes
I’ve tried shooting them at full length and they fly ok at about 12 -15 yards but really need to cut them down to my draw length. At 20-25 yards I was noticing the difference of pile weight and length. My normal arrows are fitted 80grain points so will probably fit 80 grain piles for true comparison.
Further testing
Having now cut them to my draw length and fitted 80grain points I can add a couple of extra observations.
Being spruce the wood feathers or crumbles a little when tapering them. I found the same with other spruce and to be fair these were better quality.
Removing the old piles was easy using a gas ring to heat them for about 10 seconds and then unscrewing with a pair of pliers. Not sure if the 100 grain field point will blunt if a wayward arrow were to hit a rock, but this is the same for other pile designs and the reason I prefer steel to brass.
Having shot them they fly very slightly high and to the left but only slightly which makes me think slightly stiff.

Grouping at 15 yards
Flight wise, they are very good and I’ve shot them a couple of hundred times.
I’ve not missed so badly as to bounce them off a tree yet so not sure of durability but am sure I will find out soon.
UPDATE – First casualty and note to self. If you shoot your own arrow it breaks. Managed to shoot the pile off one. Yes pile, not nock, that takes skills.
First casulaty of the testing
Overall a 8.5 to 9/10 due to the nock colour.
Thanks for reading

Quite often I find my arrows break directly behind the pile, leaving a small piece of wood inside the pile which can be difficult to remove especially if you want to reuse the pile.
I know some people drill the wood out and others simply throw away the pile.
Well I thought I would show how I remove the broken piece of wood.
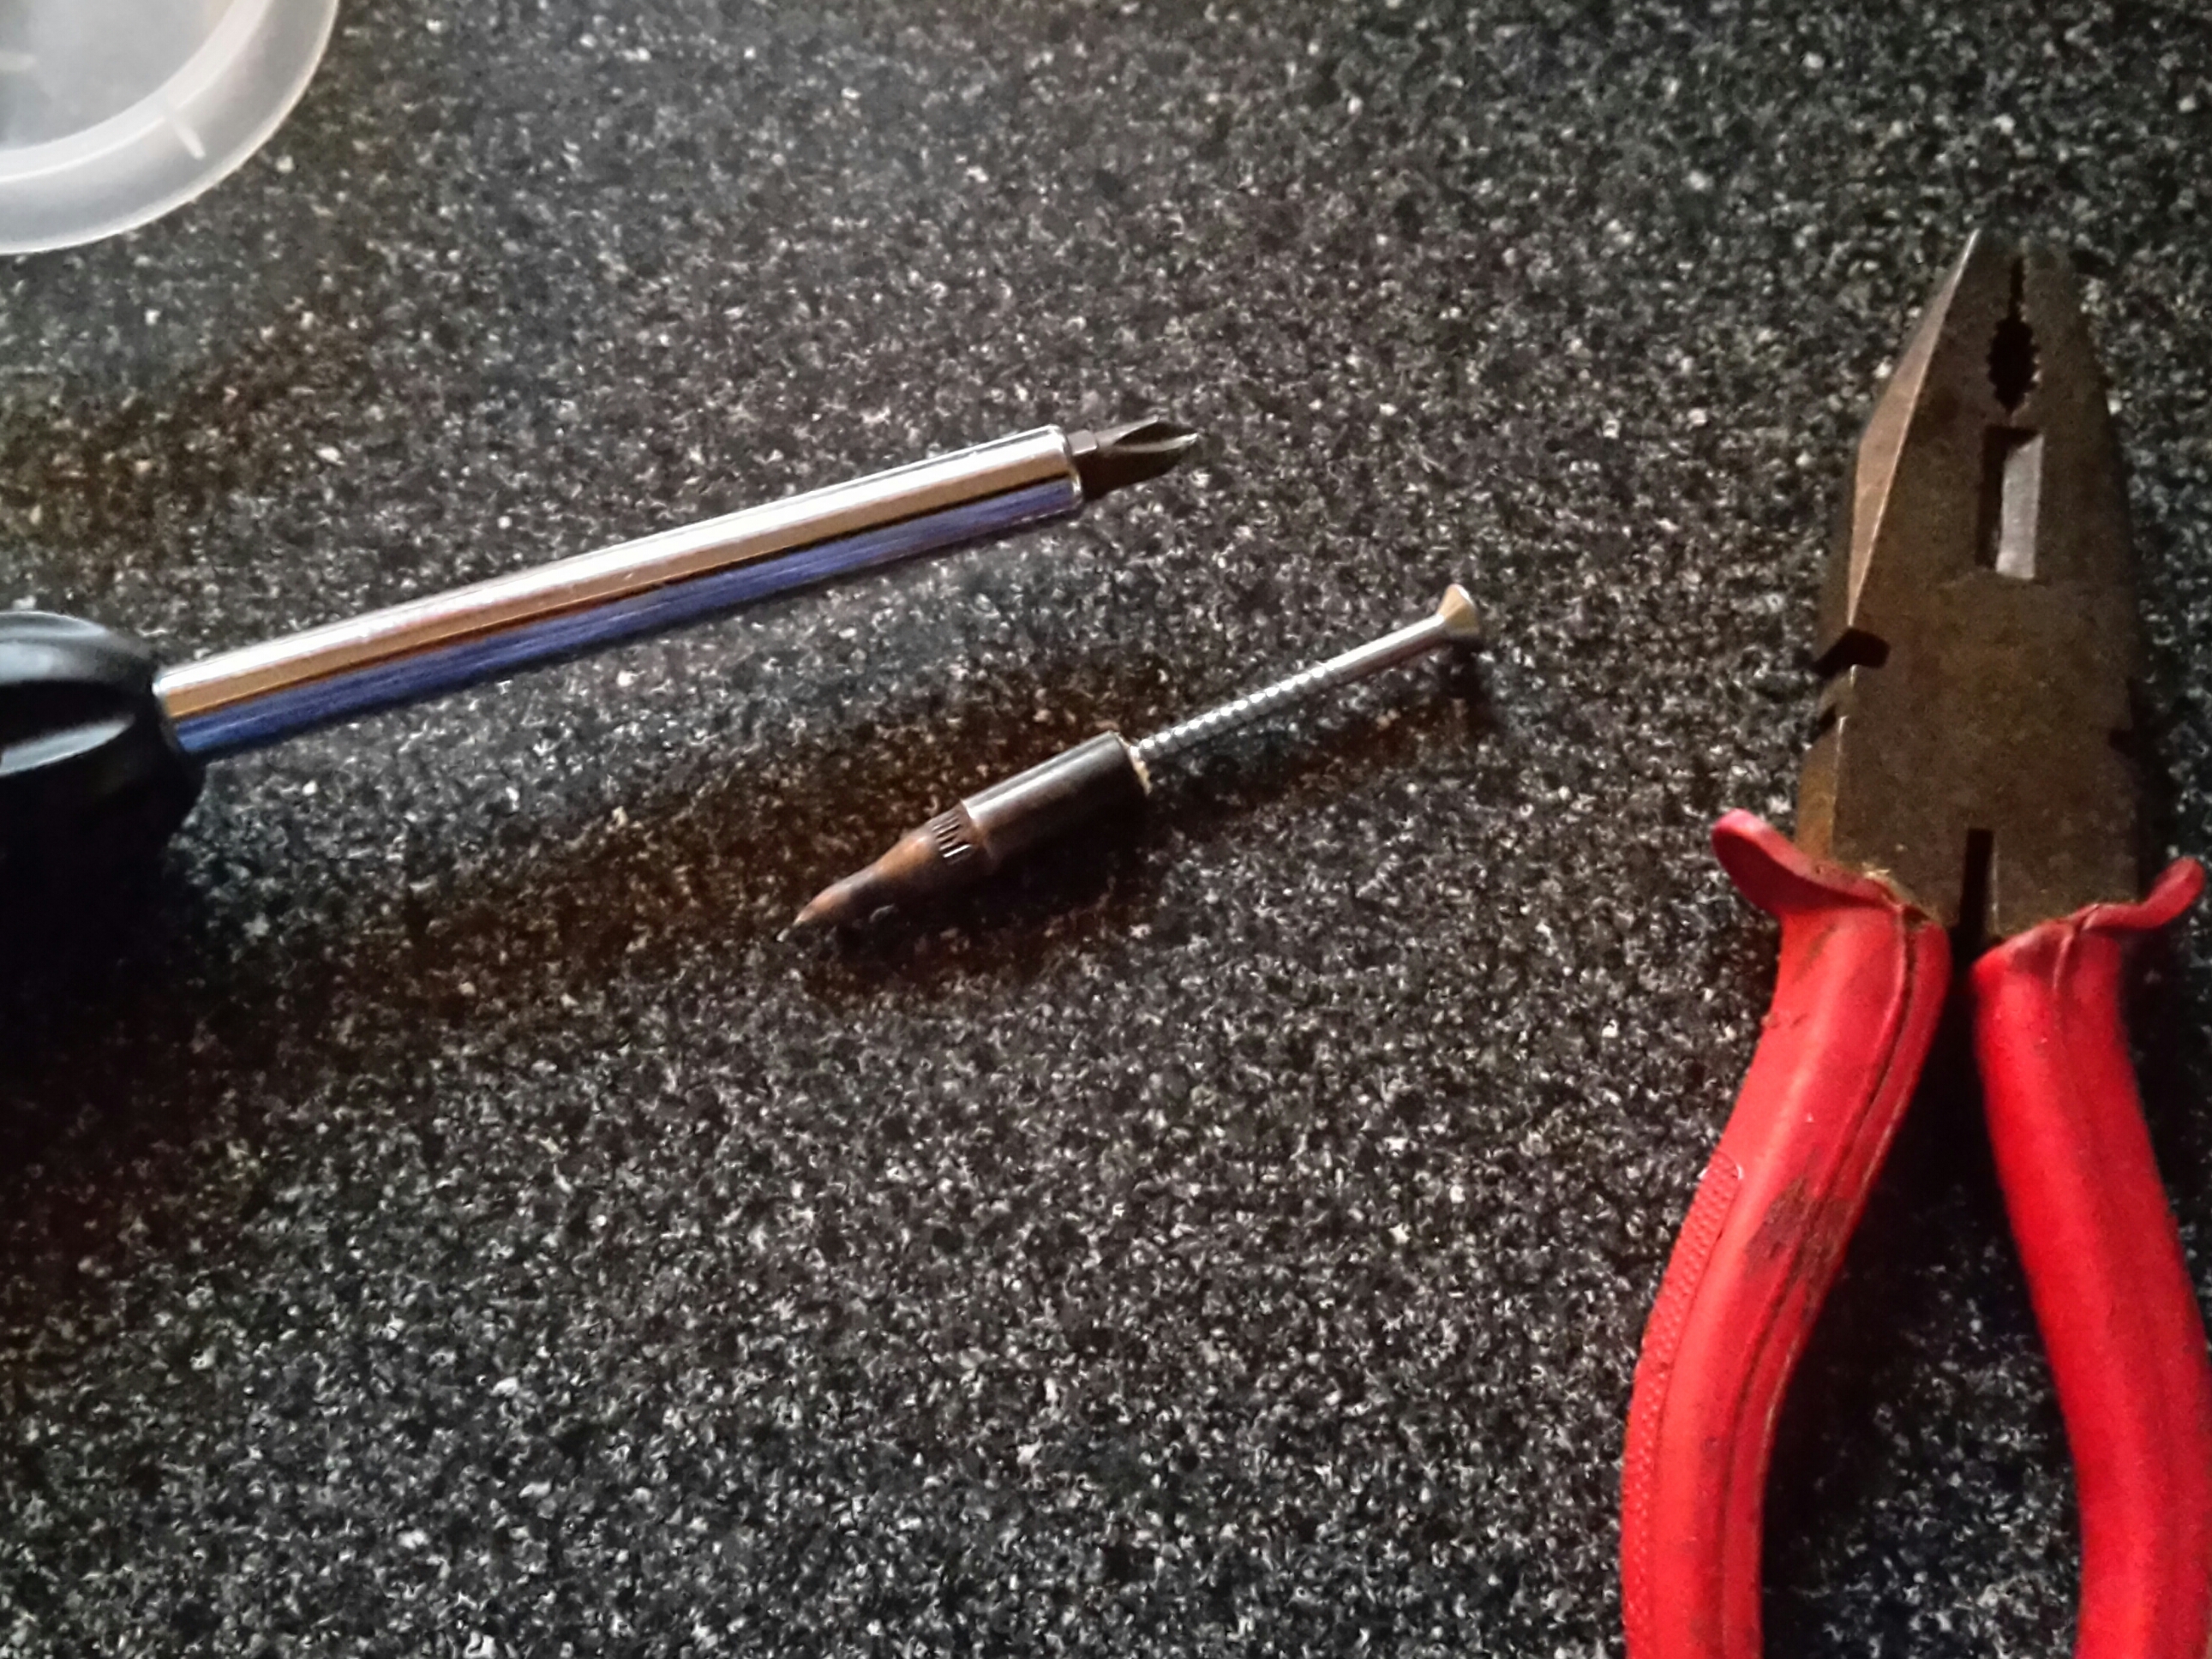
Tools required
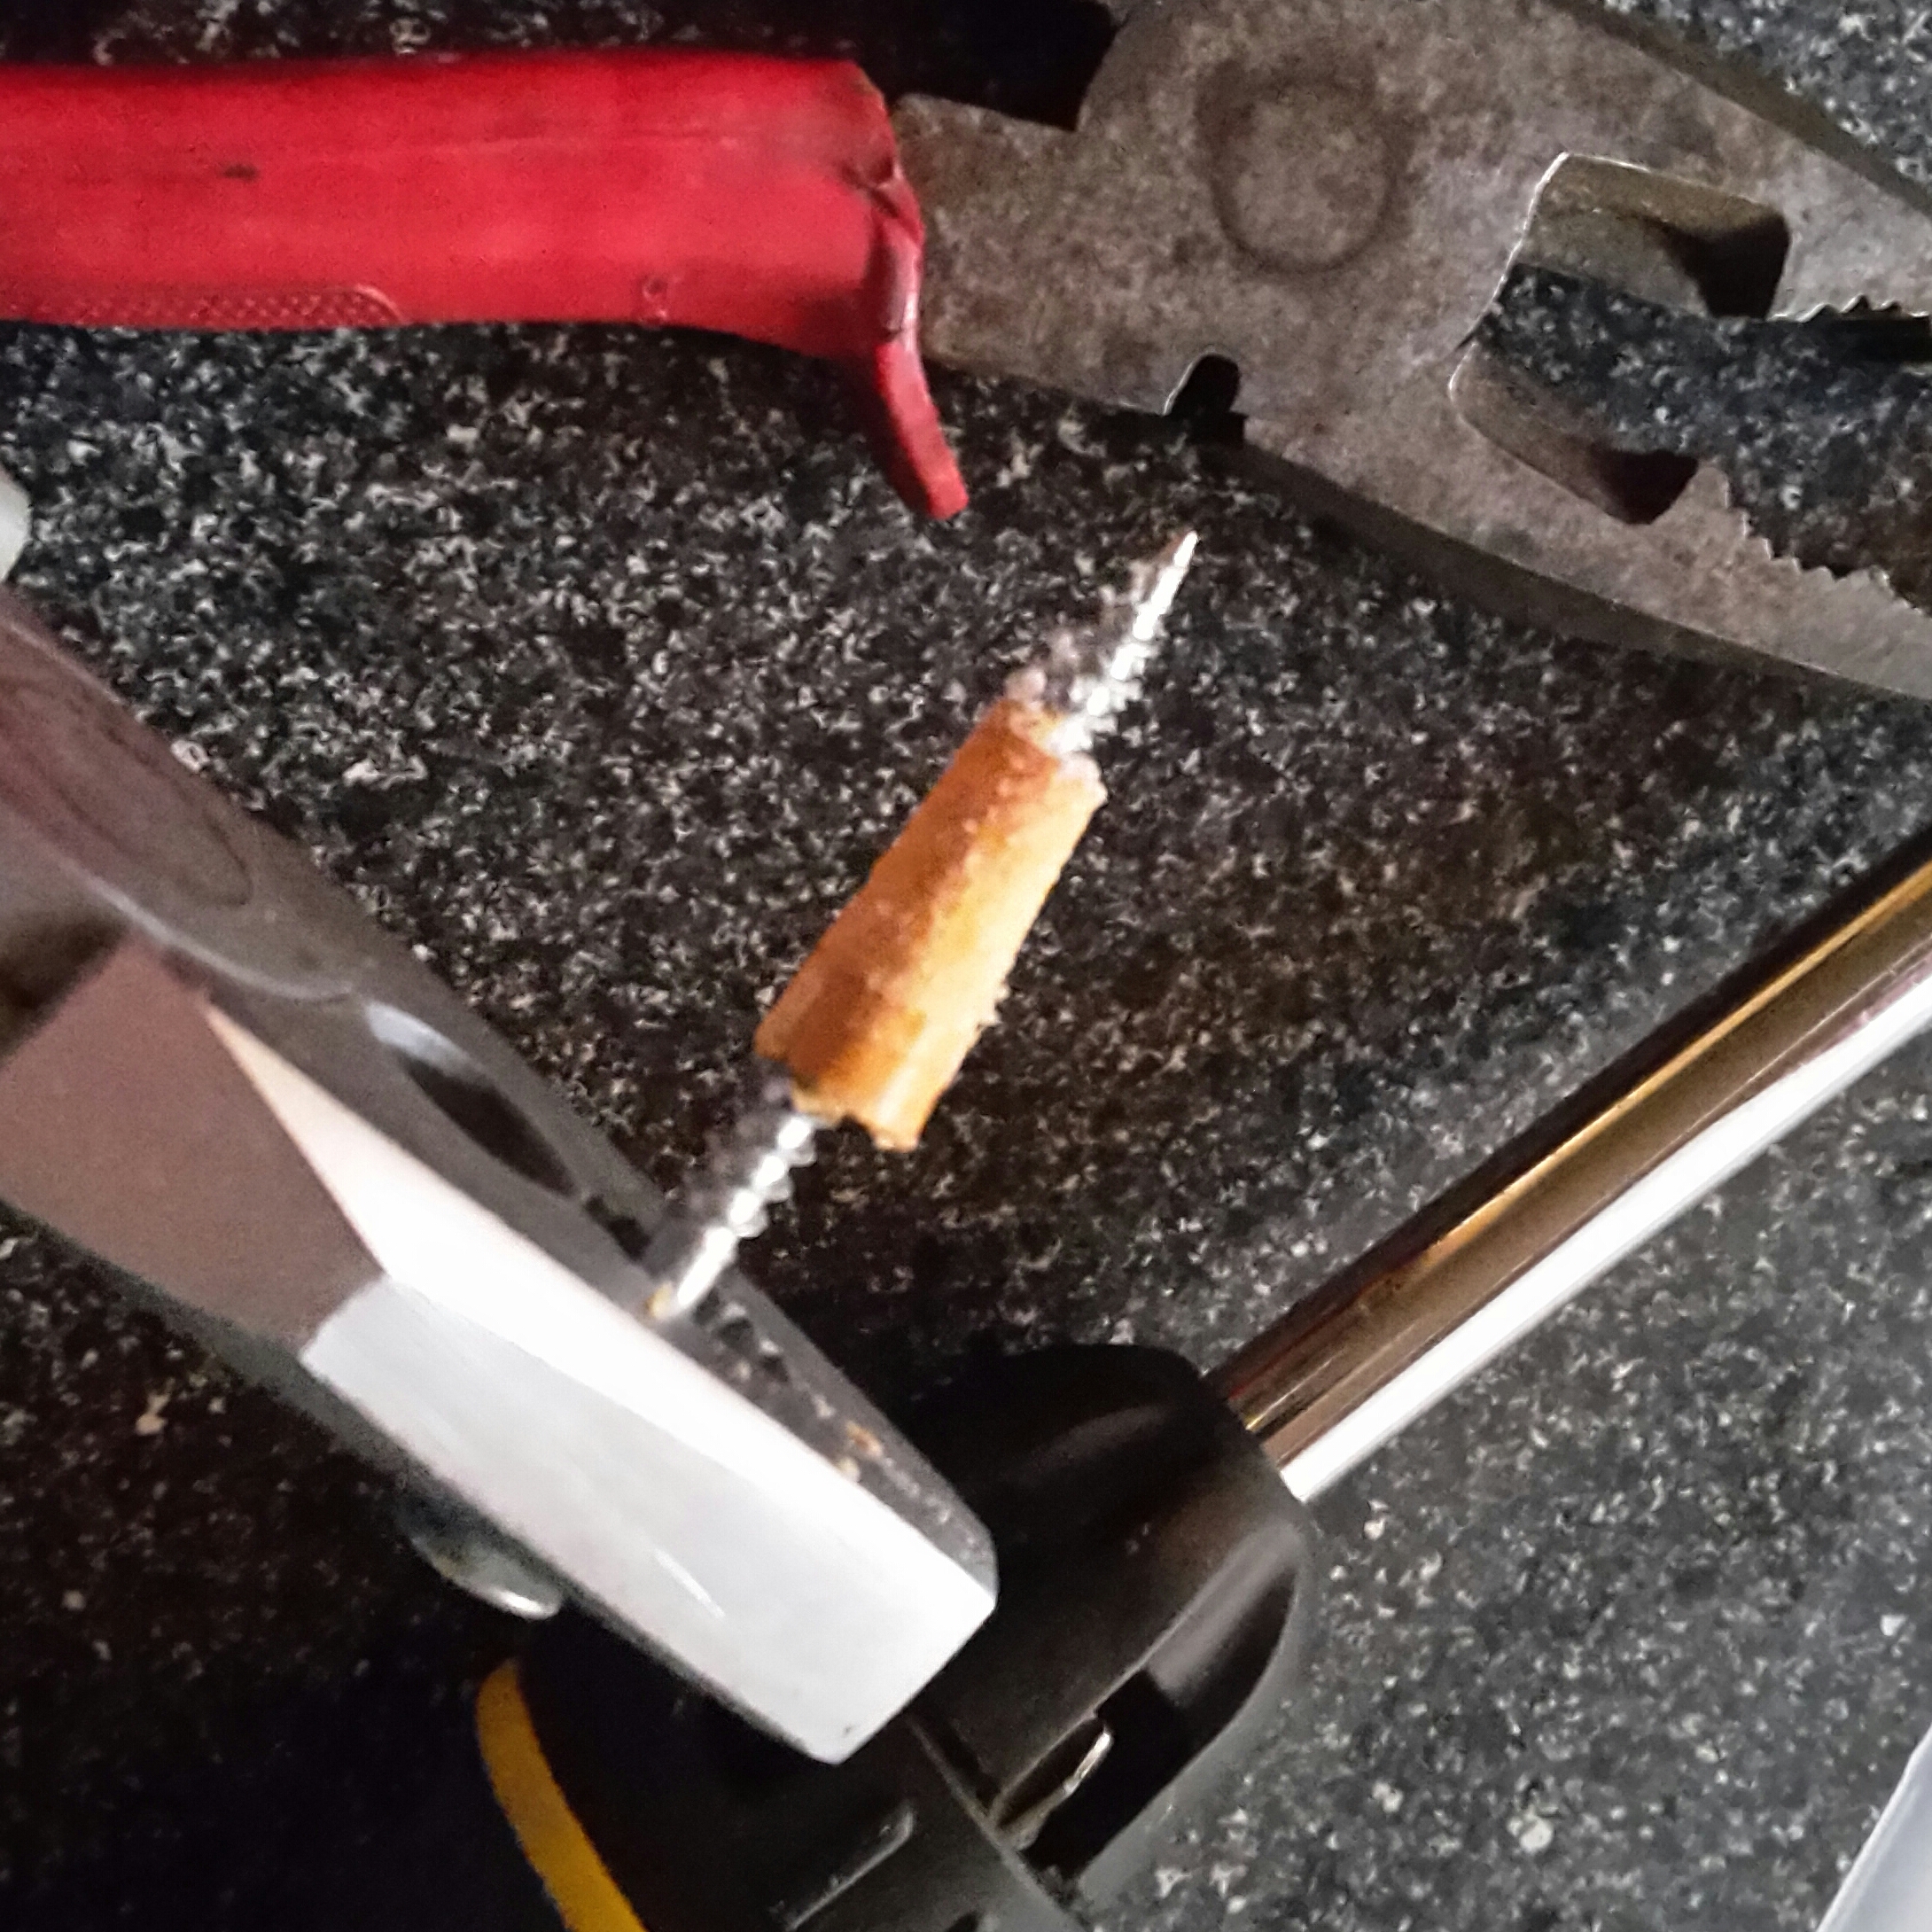
Screw into wood
Word of warning here.
I usually use screw on piles, but if you have taper fit or parrell fit you can have the piles pop off as the glue and gases in the glue expand under the heat.The reason I mention this is on one occasion when removing a pile I left it in the ring to heat up too long as I worked on another. I heard a loud pop and saw the pile shoot across the kitchen towards the window and the screw and wood went in another direction. Fortunately no one was injured and nothing was broken (otherwise I think Sharon might have injured me)

Heating the pile
Step 3
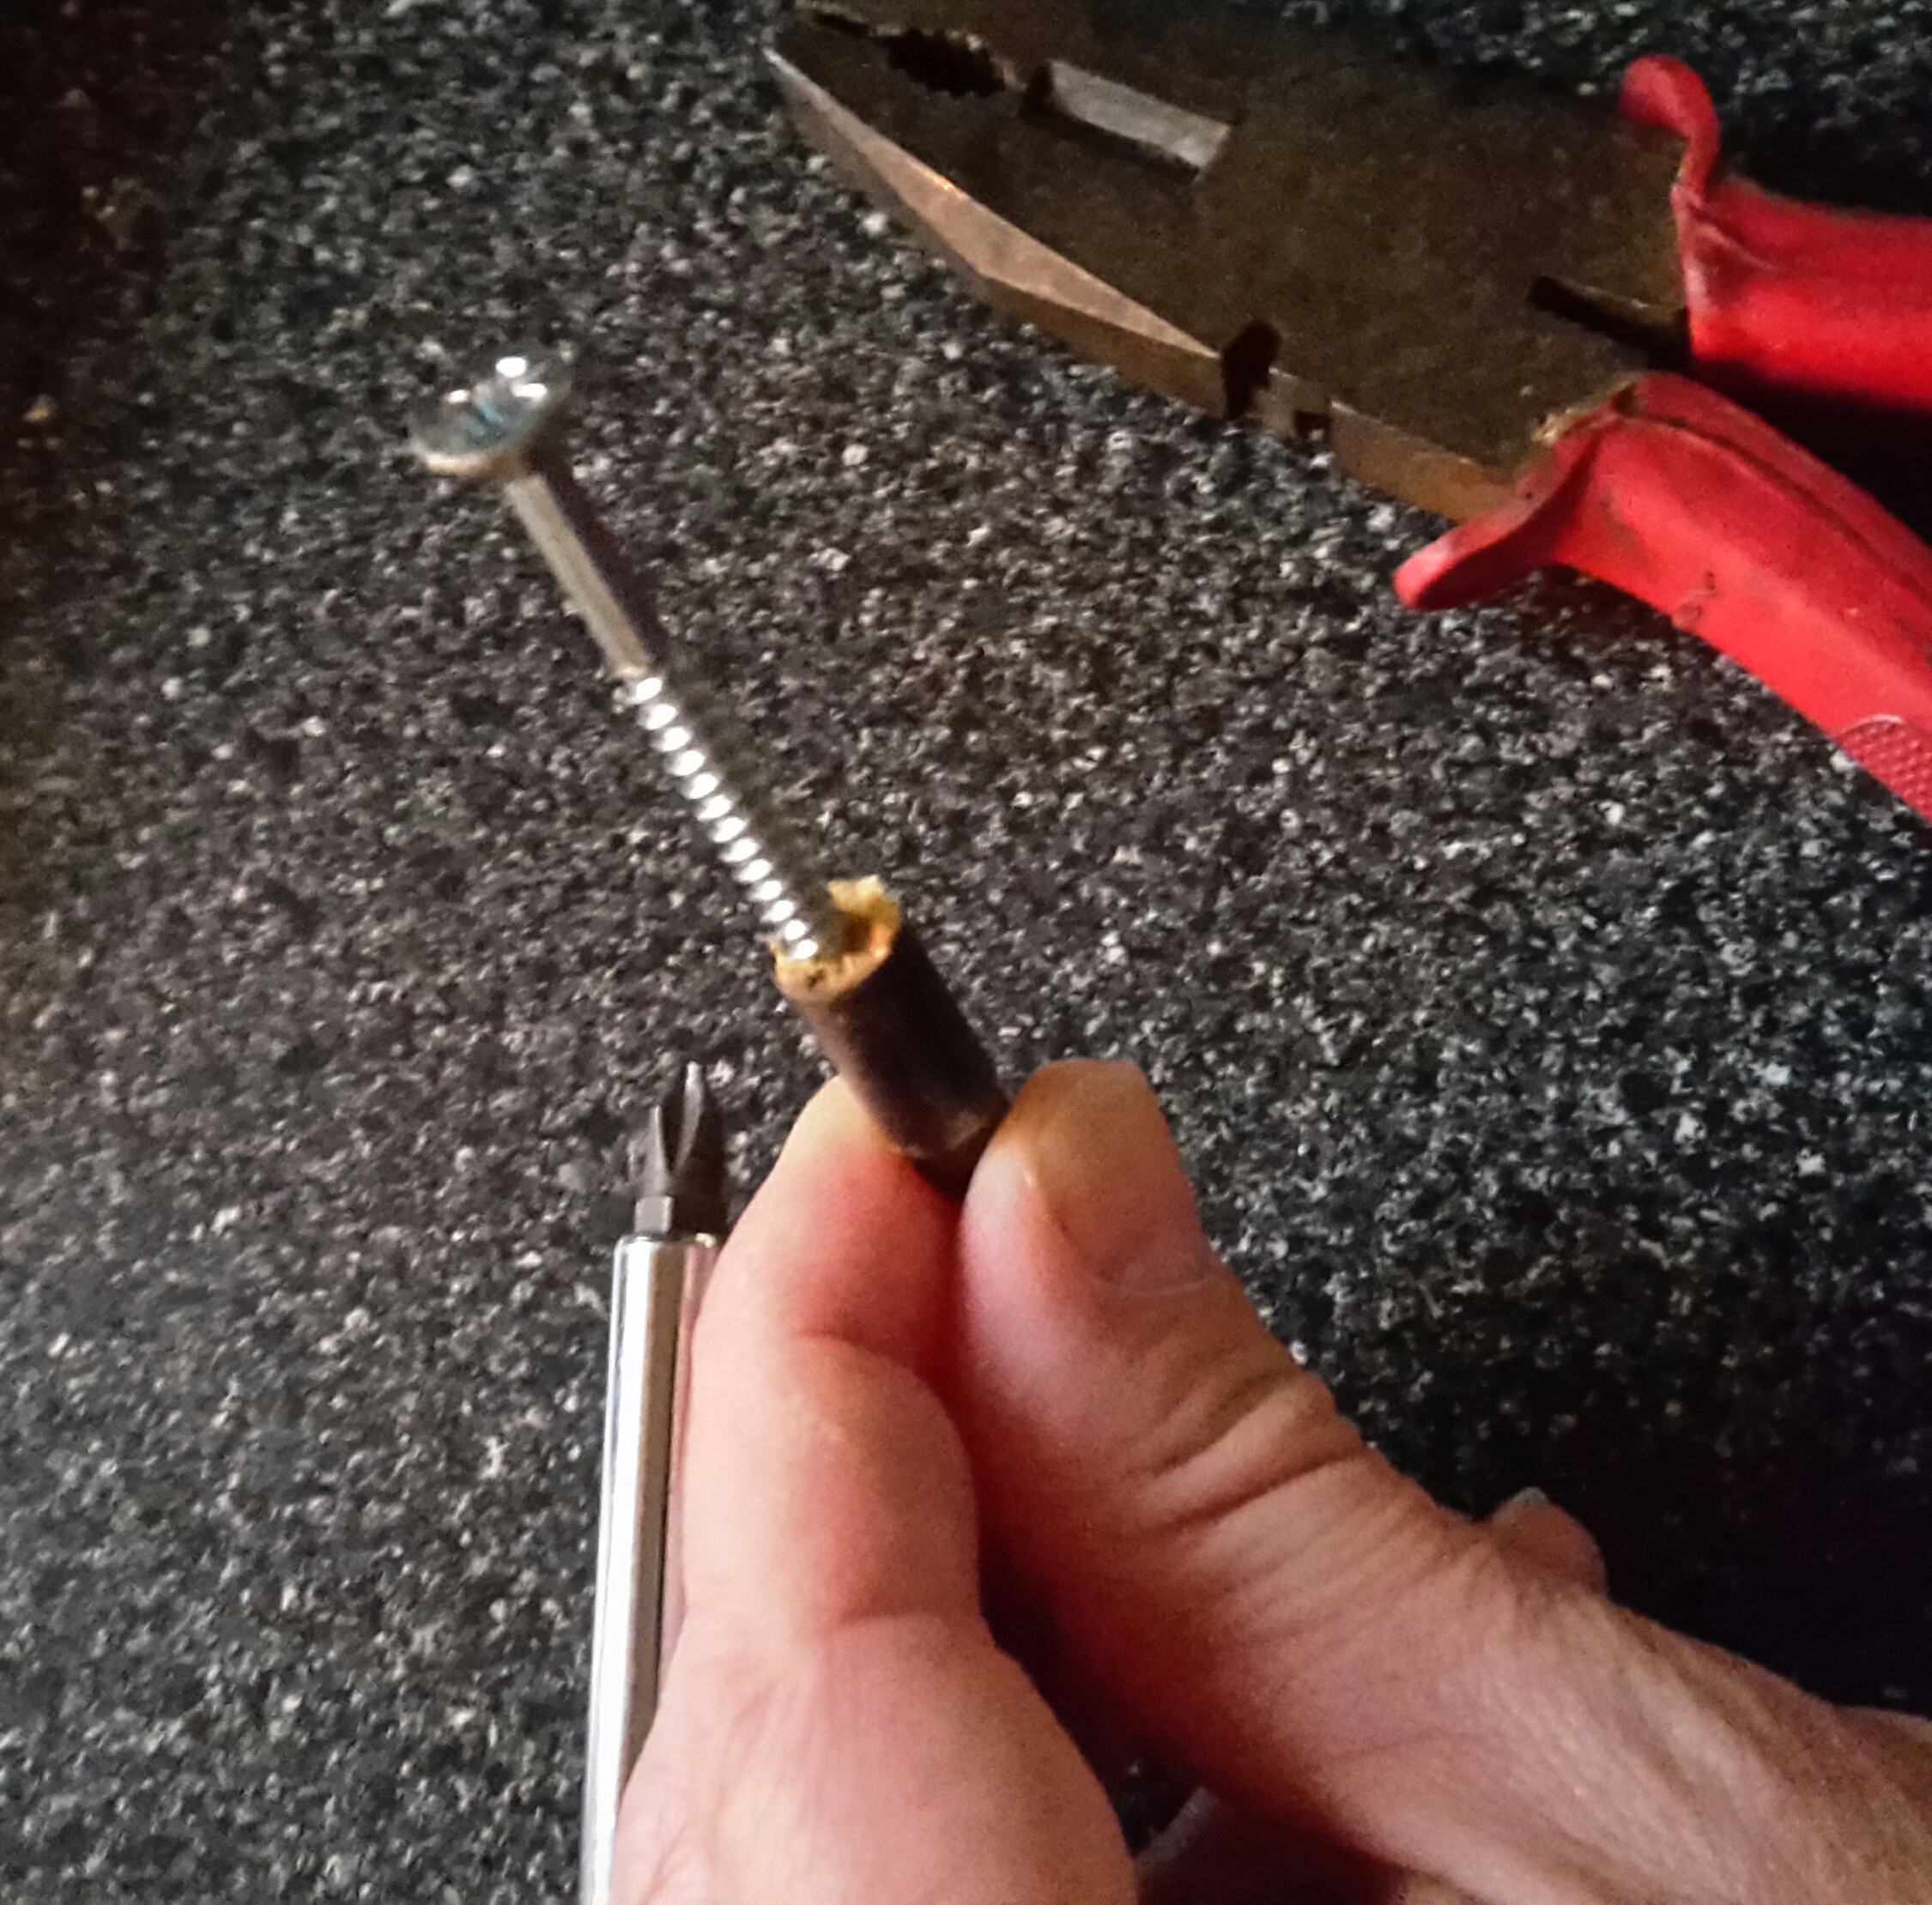
Holding the now heated pile in the pliers (don’t grab it with your hand as it will be hot) take the screw driver and continue to screw the screw into the wood.
You should find that because the glue has melted and lost adhesion to the pile the screw will force the wood free. Resulting in the wood remaining on the screw and free of the pile.
Wood remains on pile
Step 4
Drop the pile and screw into a pot of cold water to cool. Once cool you can dry the pile.
You might need to clean out the inside of the pile of glue residue with a bit of wire wool or I find an old shaft tapered down and screwed in and out a couple of times works well to dislodge any residue.
The easiest way to remove the wood from the screw is to hold the wood in the pliers and then using the screw driver “unscrew” it.
Hope you find this useful.
Thanks for reading.


