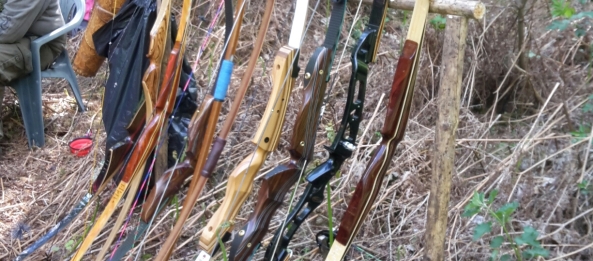
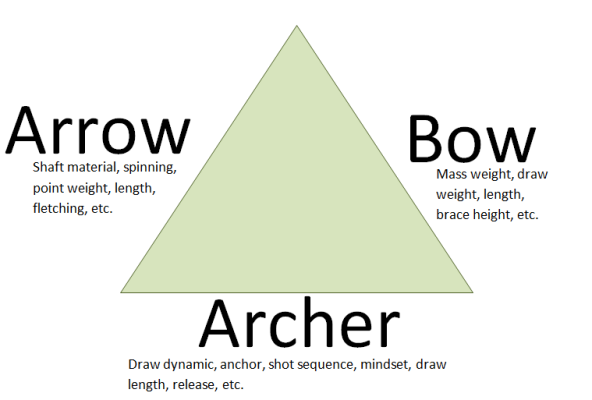
In the previous post on overcoming target panic I talked about building confidence and how knowing your arrows can help give you confidence. In this post lets look at the second side of the archers triangle the launcher of those projectiles, our bows.
Our bows come in all shapes and sizes. They can be a hand crafted traditional English longbows or the latest high tech compound from Bowtech. Yet they all share one or two key facts. They are all designed to perform one function, to launch a projectile effectively and hopefully deliver said projectile to the target. They all require correct setting up and maintenance at varying levels of complexity to ensure they perform this task. Just to be clear though I’m not going to go into detail about tuning bows in this post, that’s for another time. What I am will do is give you some points to consider,
So I want to start by pondering a couple of questions.
Does your bow perform exactly the same each time you use it? I’m not talking about how well you shoot it but how well it performs. Hopefully it does, but what if it doesn’t. If we take this question further and look at one element of set up as an example, the brace height.
How often do you check your bows brace height? Each shooting session, once in a while?
For traditional bows or take down recurves the question can be Is the brace height the same each time you string it? Its very easy to drop the string and loses a few twists. Alternatively if it is a new string it could stretch slightly as it beds in.
Without knowing the bow is performing consistently how can you have confidence in its behaviour and its delivery of the arrow to the target.
Definition of brace height – the brace height of a bow is the gap from the string (nocking point) to the riser. The actual brace height of different bows vary, but all manufacturers will provide an upper and lower limit. Normally for a recurve this will range from about 7 1/2 inches to 8 3/4 inches.
One tip I will share is using your arrows cresting to help you check the brace height of your bow, as shown in this photo. The black banding is set at the ideal brace height for the bow as it lines up with the white band you can see.
Tune don’t Twiddle
I would always suggest you spend some time and ensure the bow is set and working at its best, tweaking brace height, nocking point etc. until you reached the optimum. Once it’s tuned and working well stop. Yes, stop. Focus on learning to shoot that bow. If you are constantly altering elements of your bows set up, say the brace height or nocking point, then you will have an ever changing platform on which to try and learn to shoot. This twiddling or constant changing will not help you develop confidence in being able to shot the bow.
Top tip – If you have something that works please don’t be tempted to twiddle or tweak it, especially in the run up to a champs or competition. You might think it will help and get you those extra few points, but the flip side is it could cause all your training to be for nought if it has a negative effect on your setup.
I’ve seen lots of archers spending a fortune on kit, along with hours of time chasing the idea that a slightly different spinning of arrow shafts or couple of extra twists in the string will make the difference. When in reality they already have something that works really well and changing means quite often they lose confidence in their kit. As well as points on the score card.
“Learn to shoot with the bow you have” was something my old coach always said. Know that it works and your arrows work and this will give you confidence.
I tend to record what works well for each of my bows. This means I have a record of string length, brace height, plunger set up, etc. for all my bows and over the years I have found photographing the brace height and nocking point particularly useful. I have found this makes it much easier when setting up a new string. It provides visual guidance something that makes your life much easier. I tend to bring the image up on my tablet screen so it’s large enough to see easily.
Using your phone camera is one piece of advice I will offer as it can not only help with set up, but also monitoring any possible problems i.e. how much has the string stretched or worn over the space of a few sessions.
Bows like arrows are susceptible to damage, this can be via accident such as dropping it or through ignorance in improper usage.
Again your camera phone can help here for documenting wear and tear on your bow. I’ve know archers to use their phone cameras to photograph the limb bolts after marking them to see if they undo over time. Other forms of damage can occur from incorrect usage such as dry firing.
Dangers of dry firing
What is a dry fire? It’s when you draw back a bow without an arrow loaded on the string and release the string.
Why is this a problem?
All the energy that would normally be transferred to the arrow from the bow has nowhere to go other than back into the bow. This is never good and has seen bow risers break, limbs delaminate or even snap. There are a few YouTube videos on what happens and archery360 has produced a good one.
In short NEVER ever dry fire a bow.
Arrow weights V bow damage
While talking about bow dry fires I want to mention arrow weights. Be mindful of how light your arrows are. Some manufacturers recommend a minimum arrow weight for their bows as a safe guard against potential damage or failure. Shooting an arrow that is too light can be akin to a series of mini dry fires and over time can lead to damage to the bow. So check if the manufacturer’s have a minimum arrow weight.
String maintenance – It sounds like a simple thing to remember but I am always amazed at how few people actually maintain their bow strings. Whether this be waxing it on a regular basis or just checking for any fraying or damage to the serving. If you shoot a compound bow with a d-loop, please keep an eye on these. I’ve seen an archer at full draw have their D-loop snap. The arrow went flying off some 50 yards. Our coaching equipment is regularly checked as we’ve noticed wear and tear on the serving loops from them being fitted and removed constantly.
Please don’t over bow yourselves. I know I have said this so many times before but it’s really important. A well set up bow with well matched arrows often negates the need for heavier draw weights. One final point for you to ponder I’ve written previously about the benefits of having and using a light poundage bow when working on form or recovering from injury etc. So much as it might be tempting to exchange or sell the lighter poundage limbs you might want to hang onto them just in case.
Personal insight
This process of arrow and bow set up certainly gave me confidence when I started. Knowing the quality of the arrows and the bow I was shooting, and they were working correctly together meant there were less things for me to worry about.
Both of these elements are pretty easy to tune given time. The fare harder part is the archer, as unlike the bow and arrow, the archer has a mind of their own. The thing is once you know your kits right, you will inevitability grow in confidence as your bow delivers your arrows with more consistently at short, medium or long distance.
So lets start looking at building confidence in the third and final element, the archer.
Thanks for reading.


Pingback: Before we start a quick reminder | My Archery Experiences
Pingback: Target panic techniques – blank boss shooting and Target face anxiety | My Archery Experiences
Pingback: Target Panic – Your journey starts now | My Archery Experiences