Archery Backstop Net

Archery backstop nets – some thoughts

In an earlier post I provided an overview of a few of the sort of things to consider when you are setting up a target boss. In this one I am going to talk about my views of backstop nets, including trying my hand at  busting some myths associated with them.
Backstop nets can be a useful addition to any range, but there a few things to consider about their use, so I will start with some mythbusting on the topic of backstop netting and what they can do.
A backstop net will stop the arrow. 
Not always. I shot a 11/32 diameter wooden arrow from my 45lb flatbow, which comes out at 180 feet per second. So it;s not as fast as an arrow off a barebow or compound bow, nor is it as small a diameter as a carbon arrow. Yet my bow has launched an arrow through backstop nets on more than one occasion and said arrow has travelled a considerable distance beyond.
The net, if hung correctly and in good condition may slow and possibly stop an arrow. Key words there are “hung correctly”, “good condition” and “possibly stop”. There are no guarantees.
Putting up a net make a dangerous shot safe. 
WRONG in so many ways!! If a shot is unsafe then adding a net isn’t going to suddenly make it safe. Nets are not there to make dangerous shots safe, they are there to reduce the risk.
Stretching out a net to cover as large an area as possible does not increase safety.
In fact it makes the net less effective as it needs to be both free hanging and pleated, much like a net curtain in the window. So if you have a 5 metre gap to fill you need a 10 metre wide net.
The more material the more likely it will slow an arrow.
It doesn’t matter if it’s trailing on the floor.
 Ideally you want the net to be free hanging and only just touching the ground so it can move slightly when the arrow hits, thereby absorbing some of the arrows energy. If the net is taught or lots of it is on the ground, then it won’t be bale to move.
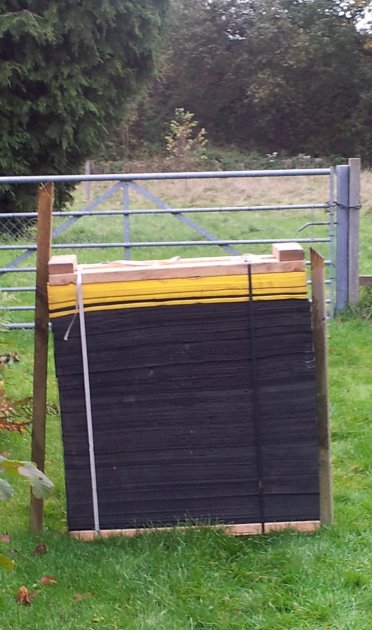
Old  carpet work just as well. As someone who is using some old carpet as an extra layer of protection to stop arrows, it may sound strange to say old carpets don’t work. The truth is they don’t work as well a proper net. I use a double thickness carpet at the end of my range. The thing to remember is this is 60ft behind the target boss on the fence line. Before any arrow gets that far it has to go through 50ft wide copse of trees as shown in this photo.
Close up of Sharon shooting

Close up of Sharon shooting

Lets have a quick look at a set up as an example. In this photograph we can see a net hung ready to be used. What do people think? Can you see any problems or issues?
Archery Backstop Net

Archery Backstop Net

Here’s a thought, what’s behind the net? You can see from the second photo there are vehicles behind so any arrow passing through the net is likely to impact one of the vehicles.
Archery Backstop Net - different angle

Archery Backstop Net – different angle

The other thing to consider is the net is strung up quite tight, with no pleats so any arrow hitting the net is likely to pass through.
By the way, this is not where the net normally hangs as I had just put it up to dry out after it being used on our clubs course the week before.
I hope this provides an insight into the use of backstop nets. It’s not a definitive list of topics but hopefully an eye opener.
Stay safe and thanks for reading.

Setting up a target boss – revisited

With recent worldwide developments concerning COVID-19 seeing more and people self isolating, working from home or simply having a lot more spare time on their hands, there has been quite a lot of posts on Facebook and other sites about home ranges, or practising at home.

I am going to highlight a few things you might need to consider. I am no expert and this is by no means a definitive list, but more of a starting point of things for you to consider.

  • What are you going to shoot at? What type of target or target boss? Will it be sturdy enough to stop your arrows at close range? Check out What target is best for me?
  • Can you safely shoot in your garden without endangering yourself or others? Think of pets, child, wildlife or even surrounding livestock? Consider also garden sheds, greenhouse and garages.
  • What of overshoots into neighbouring gardens, farmers fields etc?
  • Do you have insurance if anything goes wrong? Chances are your house insurance won’t cover you and you may have to take out some form of specific insurance.

Location, location, location

No I’m not talking about the TV property program commonly seen in the UK, but the physical location of your target boss. Look at the space surrounding the boss in the image below. What do you see?

Target Boss

Firstly there appears to be a stile behind and to the right of the boss. Does this mean there is a footpath behind the gate and we are likely to see people walking past?

What about the space behind the boss with regards to overshoot? Do you need to have something that will catch and stop a stray arrow? A safe over shoot area is vital for any target positioning. The metal gate seen behind this boss is also a risk. If an arrow misses the boss and hits the gate it is likely to deflect in any direction.

Did you spot the wall of the building to the left side of the target? You wouldn’t be able to see people approaching from that direction.

Securing the boss to the stakes is vital to ensure it doesn’t topple over when arrows are removed. It is worth considering whether the stakes need to be proud of the boss, unlike the image below. Also try to put them to the side or rear of the boss frame so as to avoid or limit the number of arrows hitting them.

One quick cautionary tale of a friend who set up a target boss in his garden. Unfortunately it was quite an old target boss and the arrow went through it, through the wooden shed wall behind and straight into his lawnmower! He wasn’t allowed to practise at home anymore.

Those are a few thoughts and topics to consider when positioning practise bosses. Have you got any further advice? If so why not add a comment below. Lets look at the orientation and securing of the target boss now.

Securing the boss

Setting up a boss is a common activity, but does require some thought and care to ensure it is done both correctly and safely, whether this be on an archery course or as in this example in the garden for a home practice range. Here you can see a boss having been erected ready for practise. Looks good? Can you spot any issues?closeup

Well one commonly made mistake when setting up a boss of this nature is forgetting to check where the metal binding for the plastic strapping is located. These should always be on the back of the boss and never facing the direction of the shot.

Why? The binding clips used for banding can damage arrow tips if they are hit. I have also seen arrows shot from a compound bow hit one of these metal fastenings and bounce straight back some 15 yards, landing at the archers feet.

You should also ensure the wood frame of the boss is always to the side and not on top or bottom.

Why? If the arrow falls low, it will run the risk of hitting and embedding itself in the wooden frame, which is likely to  result in some work to extract. If the arrow impacts at the top of the boss it runs the risk of deflecting off in any direction . So rotate the boss to ensure the wood frames are on the side of the boss.

Target Boss

Insurance

Give some serious consideration when it comes to insurance. Some people believe that being members of a national archery society or club gives them cover to shoot at home, which isn’t necessarily true. I know this is something that has come up on the National Field Archery Society Facebook group and I expect it the subject has been raised on other sites too.

We have our own personal insurance that covers Sharon and myself when shooting on our home range, which we got through Gunplan (https://www.gunplan.co.uk/) . The field is also registered as one of the clubs sites as we use it for training sessions.

N.B. The target boss doesn’t normally sit there, it was simply positioned there for the photos for this post. It’s normally in the field beyond the gate. We are fortunate in owning the field at the rear of the property and know there is no public access or routes to it other than via our boundary. We have set up a 40 yard pegged range, with a 60ft over shoot before a backstop of old carpets at the fence line and then  30ft high earth embankment beyond.

I hope you find this article of interest and if you have any comments let me know. I’m putting a brief one together on the use of backstop nets too, when I get the chance. Thanks for reading and stay safe everyone.

Archery target boss rebuilding and banding

From time to time your target bosses will need repair. Sometimes this is a complete rebuild, other times the boss simply needs the banding tightening. In a recent post I discussed a tip on banding bosses, in today’s article I’m going to cover a rebuild on a layered foam target boss.

These types bosses are very common on most field courses and consist of layers of thin foam with wooden sides. The foam is compressed between the wood sides and remains compressed thanks to the banding straps which run round the outside of the boss.

Finished boss

Rebuilding a boss can be a daunting prospect, but taking it slowly and steadily helps. I think the most nervous part is removing the old banding and realising there is no turning back.
One tip – ideally you want to avoid having buckles or banding fasteners on the side of the boss facing the archers . This avoids arrows hitting them, as this both runs the risk of damaging the arrow and the banding holding the boss together. Many years ago I recall being on the practise bosses for one shoot next to a very competent compound archer who released his arrow, only to have it bounce straight back 15 yards to his feet. It had hit the metal fastenings of the banding.
We try to set them on the side or top of the boss, this means they are accessible and we can be tightened up if needed.
This boss is in pretty bad state,  firstly it’s pretty old over 4 years and not been repaired recently. Also it’s only been used one way round so all the damage is one side of the form sheets. That is visible from the image below.

Not looking good

Sometimes the wood framework on the sides of the bosses needs replacing. Fortunately in this case the wood is mostly okay and should last another year or two.
I think one reason for this might be the boss is not in direct contact with the ground and instead sits on a couple of layers of polystyrene foam. This appears to have helped keep it from rotting away. The wood had also been treated with wood preservatives previously. It’s worth noting that the latest target bosses we’ve bought for the club needed wood preservative applying.
So the first step is to remove the existing banding so you can view the condition of the foam.

Side showing more damage than other side

I started this outdoors but the wind picked up so moved into the shed. The last thing you want is to have the foam blown across the field or woods. It might look comical but would be a pain.

Not in a healthy state

I removed the foam in sections which allowed me to inspect the sheets removing those that were the worse damaged.
Take care when doing this as you never know what you might find. Considering me and Sharon don’t shoot carbons it was a bit of a surprise to find a sliver of carbon about 3 mm wide and 12 cm long between the layers.

Carbon fibre sliver found in the boss.

Once all the foam has been removed and checked, I start to stack it back into a boss shape on top of one of the wooden sides. The foam from the edges of the boss nearest the frames were the least damaged, so I used these in the centre and those that had been in the centre and were still usable I moved to the sides.
I would be assembling the boss effectively on its side layering the foam sheets on top of one another, trying to ensure they were all straight and lined up. Easier said than done as I discovered some sheets (the yellow ones) were slightly smaller than the others).

So it begins with first layer

By moving the foam sheets from the sides to the centre  meant the best quality foam would make up the centre of boss where most of the arrows would be hitting.

Gradually build up the layers

When I have stacked the foam I placed the other wooden side on top.
It is really worth taking your time to do this as you want to keep it straight. I ended up redoing this a couple of times to make sure the boss was reasonably square. For future I might build some form of backing board to stack them against to ensure they are stright and even.
I then used a ratchet strap on the boss to tighten it up in readiness for banding positioning it centrally initially so I could get the first couple of banding straps on.

Strap to tighten and compress foam.

Side on view

I then moved the ratchet strap to run along the sides, top and bottom. This allowed me to add the last two banding straps.
Once these were tight I returned to the first two to tighten them back up. I expected this would be necessary as the foam became more compressed.

Tightening the first banding.

You will end up with a smaller target as you removed the damaged foam. This one went from a 900 mm to an 820 mm. For this reason it’s not uncommon to work on a few bosses at a time, as you might find that out of 3 or 4 initial bosses you will end up with only 2 or 3 repaired ones
Don’t throw the old bits of foam away as you can always use them to repair and refill a bag boss. That’s my next project as I have a couple behind the shed in need of repair. Also your shed or garage floor is going to get covered in bits of foam.

Floor covered in bits

Another tip – We use these buckles for banding as it allows us to tighten the tension of the straps. It’s worth noting they can slacken up over time. The good thing is it’s easy to tighten them up.
Don’t over compress the bosses as we’ve found light poundage junior bows struggle to penetrate and arrows can bounce back. After all this you will end up with a repaired boss. Granted it may not look as pretty as a brand new one but it will hopefully work.

Finished boss

I hope you find this a useful guide to how I go about repairing bosses.
Thanks for reading.