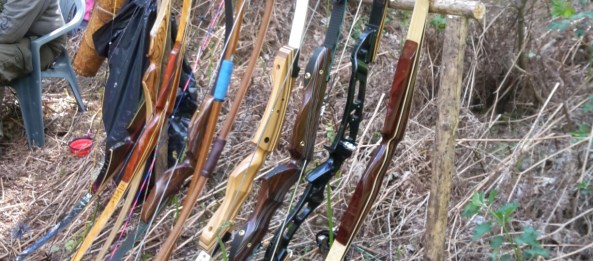
Selection of bows

Target panic and how knowing our bows can help

In the previous post on overcoming target panic I talked about building confidence and how knowing your arrows can help give you confidence. In this post lets look at the second side of the archers triangle the launcher of those projectiles, our bows.
archers triangle graphic

The archers triangle

Our bows come in all shapes and sizes. They can be a hand crafted traditional English longbows or the latest high tech compound from Bowtech. Yet they all share one or two key facts. They are all designed to perform one function, to launch a projectile effectively and hopefully deliver said projectile to the target. They all require correct setting up and maintenance at varying levels of complexity to ensure they perform this task. Just to be clear though I’m not going to go into detail about tuning bows in this post, that’s for another time. What I am will do is give you some points to consider,
So I want to start by pondering a couple of questions.
Does your bow perform exactly the same each time you use it? I’m not talking about how well you shoot it but how well it performs. Hopefully it does, but what if it doesn’t. If we take this question further and look at one element of set up as an example, the brace height.
How often do you check your bows brace height? Each shooting session, once in a while?
For traditional bows or take down recurves the question can be Is the brace height the same each time you string it? Its very easy to drop the string and loses a few twists. Alternatively if it is a new string it could stretch slightly as it beds in.
Without knowing the bow is performing consistently how can you have confidence in its behaviour and its delivery of the arrow to the target.
Definition of brace height – the brace height of a bow is the gap from the string (nocking point) to the riser. The actual brace height of different bows vary, but all manufacturers will provide an upper and lower limit. Normally for a recurve this will range from about 7 1/2 inches to 8 3/4 inches.

One tip I will share is using your arrows cresting to help you check the brace height of your bow, as shown in this photo. The black banding is set at the ideal brace height for the bow as it lines up with the white band you can see.
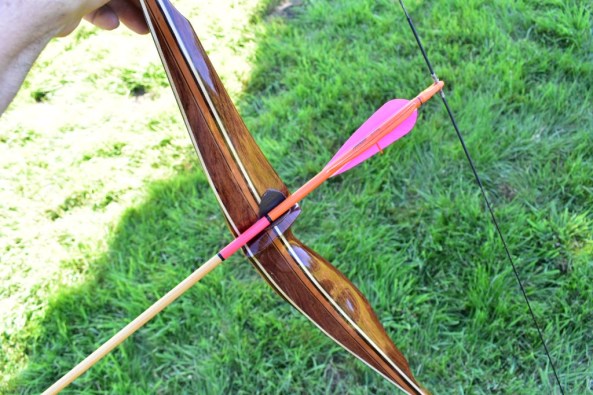
Sharons bow and arrow set up

Sharon’s bow and arrow set up

Tune don’t Twiddle

I would always suggest you spend some time and ensure the bow is set and working at its best, tweaking brace height, nocking point etc. until you reached the optimum. Once it’s tuned and working well stop. Yes, stop. Focus on learning to shoot that bow. If you are constantly altering elements of your bows set up, say the brace height or nocking point, then you will have an ever changing platform on which to try and learn to shoot. This twiddling or constant changing will not help you develop confidence in being able to shot the bow.
Top tip – If you have something that works please don’t be tempted to twiddle or tweak it, especially in the run up to a champs or competition. You might think it will help and get you those extra few points, but the flip side is it could cause all your training to be for nought if it has a negative effect on your setup.
I’ve seen lots of archers spending a fortune on kit, along with hours of time chasing the idea that a slightly different spinning of arrow shafts or couple of extra twists in the string will make the difference. When in reality they already have something that works really well and changing means quite often they lose confidence in their kit. As well as points on the score card.
“Learn to shoot with the bow you have” was something my old coach always said. Know that it works and your arrows work and this will give you confidence.
I tend to record what works well for each of my bows. This means I have a record of string length, brace height, plunger set up, etc. for all my bows and over the years I have found photographing the brace height and nocking point particularly useful. I have found this makes it much easier when setting up a new string. It provides visual guidance something that makes your life much easier. I tend to bring the image up on my tablet screen so it’s large enough to see easily.
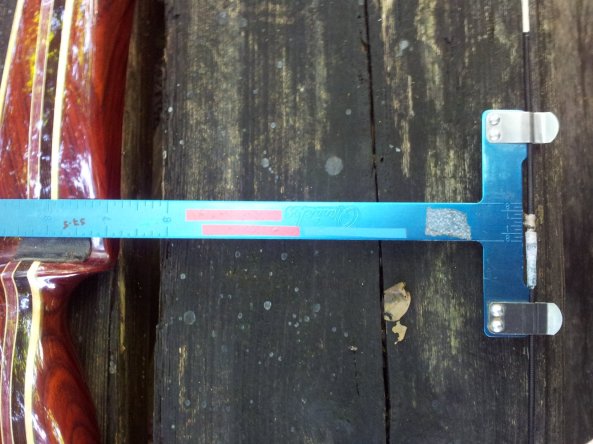
Bracing on bow

Bracing on bow

Using your phone camera is one piece of advice I will offer as it can not only help with set up, but also monitoring any possible problems i.e. how much has the string stretched or worn over the space of a few sessions.
Bows like arrows are susceptible to damage, this can be via accident such as dropping it or through ignorance in improper usage.
dmaged riser

Damaged riser

Again your camera phone can help here for documenting wear and tear on your bow. I’ve know archers to use their phone cameras to photograph the limb bolts after marking them to see if they undo over time. Other forms of damage can occur from incorrect usage such as dry firing.

Dangers of dry firing

What is a dry fire? It’s when you draw back a bow without an arrow loaded on the string and release the string.
Why is this a problem?
All the energy that would normally be transferred to the arrow from the bow has nowhere to go other than back into the bow. This is never good and has seen bow risers break, limbs delaminate or even snap. There are a few YouTube videos on what happens and archery360 has produced a good one.
In short NEVER ever dry fire a bow.

Arrow weights V bow damage

While talking about bow dry fires I want to mention arrow weights. Be mindful of how light your arrows are. Some manufacturers recommend a minimum arrow weight for their bows as a safe guard against potential damage or failure. Shooting an arrow that is too light can be akin to a series of mini dry fires and over time can lead to damage to the bow. So check if the manufacturer’s have a minimum arrow weight.
String maintenance – It sounds like a simple thing to remember but I am always amazed at how few people actually maintain their bow strings. Whether this be waxing it on a regular basis or just checking for any fraying or damage to the serving. If you shoot a compound bow with a d-loop, please keep an eye on these. I’ve seen an archer at full draw have their D-loop snap. The arrow went flying off some 50 yards. Our coaching equipment is regularly checked as we’ve noticed wear and tear on the serving loops from them being fitted and removed constantly.
Please don’t over bow yourselves. I know I have said this so many times before but it’s really important. A well set up bow with well matched arrows often negates the need for heavier draw weights. One final point for you to ponder I’ve written previously about the benefits of having and using a light poundage bow when working on form or recovering from injury etc. So much as it might be tempting to exchange or sell the lighter poundage limbs you might want to hang onto them just in case.
Personal insight
This process of arrow and bow set up certainly gave me confidence when I started. Knowing the quality of the arrows and the bow I was shooting, and they were working correctly together meant there were less things for me to worry about.
Both of these elements are pretty easy to tune given time. The fare harder part is the archer, as unlike the bow and arrow, the archer has a mind of their own. The thing is once you know your kits right, you will inevitability grow in confidence as your bow delivers your arrows with more consistently at short, medium or long distance.
So lets start looking at building confidence in the third and final element, the archer.
Thanks for reading.

Arrows role in overcoming target panic

Forest of arrows

Forest of arrows

In the previous posts, I talked about personal confidence and your mindset. In the next couple of articles, I am going to look at the role of equipment setup and how these can affect your confidence in both positive and negative ways. As ever if you have any questions or queries drop me a line.
How can we build self-confidence?
Well, that is not an easy question as there are so many different potential answers. From my perspective, I’m going to use something I call the Archer’s triangle, to help break this down into manageable elements.

archers triangle graphic

The archers triangle

The triangle is what I see as the three key elements that are relevant for all archers, whether you are a target archer, hunter or field shooter. It consists of three components, Archer, Arrow and Bow. These three need to work together successfully for the best outcome. I am not saying they all have to be perfect, but they do have to work together. Since there are three I have always thought of them as the three sides of a triangle.

Arrow – all elements from shaft construction, spinning, point weight, length, etc.
Bow – covering bow mass weight, draw weight, length, brace height, etc.
Archer –  cover draw dynamic, shot sequence, mindset, draw length, release, etc.

Building personal confidence i.e. the Archer element takes time and practise, but we can build confidence via the other two sides, slightly more quickly. So I’m going to summaries some ideas on the Arrow and Bow aspects initially.
Don’t worry I’m not ignoring the Archer element or how we build the archers confidence. I will cover this. but initially I want to focus on the kit aspects and provide a few ideas on how you can develop confidence through your kit set up.

Building confidence with arrows

So we are going to start with our projectiles, whether wood, carbon or aluminium. Arrows are a vital component for all archers. For this reason, I want to offer you a thought “If you don’t have confidence in how your equipment will behave, then you will find every shot doubly challenging?”

Think about this for a moment. If your quiver is full of arrows of different lengths, weights, spines then do you think each arrow is likely to perform in the same way?

A quick Google search will provide you with a bewildering amount of information on arrows, how-to guides on construction techniques, what works, what doesn’t work, etc. So I’m not going to cover that. What I am going to outline is how making my arrows helped me build confidence in their performance and behaviour. This, in turn, gave me confidence when shooting them.
You could argue that this is from the perspective of a traditional archer, making mostly wooden arrows, with feather fletchings, but I feel it is just as applicable for all archers, whether you are shooting Easton X7, XX75 or Easton Carbon Ones. So here goes.
Over the years I’ve probably spent hours making and tuning my wooden arrows to the different bows I shoot. Trying different combinations of arrow spine, arrow length, pile weight, fletching size and shape, matching total arrow weight, etc. I would document all this in various notebooks so I could refer back to them. Then I would shoot the combinations for a couple of weeks to properly test them at different distances and in varying weather conditions. If they worked fantastic, if not back to the drawing board and start again with the next set of variable until I found a combination that worked.
Sure I made mistakes along the way, that’s part of learning. I firmly believe that making mistakes should not be viewed as a failure. It can provide a great learning experience if we let it. Too many times I’ve seen people not learn from mistakes only to repeat them.

I found the process of making the arrows strangely relaxing after a day spent in front of a computer screen. The ability to focus on the single task of construction and stages involved in construction brought an element of mindfulness.
I also feel all this work paid dividends in two ways. I developed skills in making arrows, which I have been able to apply and teach to others. Secondly and more importantly, it meant I developed confidence in the arrow set up and how they would behave.

I may have told you this story before, but I believe it is worth another outing and helps to highlight how not being aware of your kits variances can affect your anxiety.

An archer came to me for some coaching. Their goal was to increase their consistency, especially at longer distances where they struggled most. They felt a lack of confidence shooting at distance and couldn’t understand why sometimes things worked and others times they would go high and next time low.

Reviewing their form and shot execution showed them to have a strong and consistent routine. It was only when I reviewed their equipment did an answer appear as to why they were struggling. Their arrows had a huge variance in mass weight, with the heaviest being over 100 grains more than the lightest. This would explain why over longer distances, 35 yards plus, the archer would see completely different results depending on which arrow they used. This leads them to believe it was something they were doing wrong, which had the effect of causing anxiety and loss of confidence.

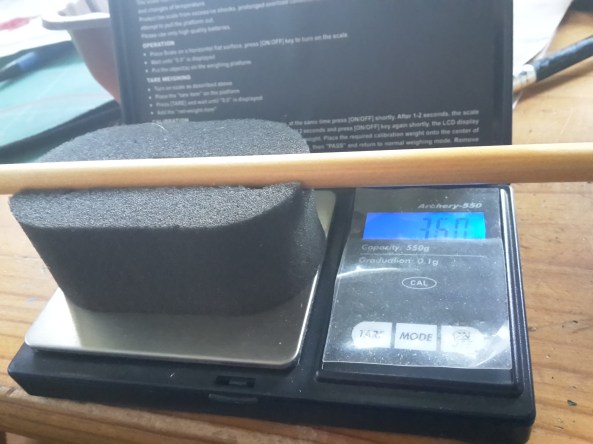
Top Tip – pickup a digital grain scale so you can weigh your arrows easily. They are quite inexpensive and can be easily picked up off the internet or local archery shop. I wrote an article a while back on my use of them. Make sure they will weigh items in grains.

Digital grain scales

Grain scales with sponge

Obviously, there are far more potential variations in shaft weight, arrow spinning etc when making wooden arrows due to the nature of the materials. When compared with constructing arrows from machined aluminium or carbon, where the manufacturing tolerances are far more predictable. Gaining consistency in your arrow set up is vital and is one reason so many people use carbon.

You might feel you don’t have the skills to build your own arrows, but everyone can develop these skills. If nothing else you can review and check the length and weight of your arrows to ensure a level of consistency.

Grouping by weight

I group my arrows into batches by weight so all the ones I shoot are closely matched, whether they are used for first, second or thirds. So 12 of my arrows might weigh in at 460 to 480 grains. I would group all the ones from 460 to 470 grains together and have a separate grouping of 470 to 480 grains.
Unlike some archers, I don’t use my lightest arrows for my first arrows (normally the longest shots), working down to my third arrows being the heaviest (normally the closest). I prefer to know they are all in the same weight range and hence will perform consistently.

Monitoring

The thing to remember is that arrows wear out over time, especially wooden arrows. Eventually, the fibres in the shaft will no longer keep their strength, following constantly impacting targets or the ground. This is sometimes called shooting the heart out of the arrow. This can have an effect on the archer as you can quickly lose confidence in yourself if you feel you are doing everything right but your arrows aren’t flying well.
For this reason, I suggest you monitor your arrows and check they are remaining straight and undamaged. This is vital for all archers to consider, especially when shooting carbon arrows as these too can fail and sometimes in quite dramatic manners. I’ve seen some carbon arrows explode when released from the bow due to the archer not being aware the arrow is damaged and the stresses involved at the point of release caused a catastrophic failure.
Like wooden arrows, aluminium shafts can become damaged and dented over time; resulting in less than ideal flight trajectory, so it’s worth keeping track of them too. Sharon used to find the Easton X7 a great arrow when shooting barebow as they could take a hit or two without deforming. Which provided her with confidence in their performance.

Thanks for reading and as I have said previously, feel free to drop me a line with any questions or thoughts you might have on topics I am covering.