Tip for when using your bow stringer

This is a quick tip which came about from a coaching session last weekend.
Saturday I was working with some new archers, who were very keen to try out their brand new bows. There is always something special about having you own bow, doubly so when it is your first one. They had bought bows, arrows, quivers everything they needed and were assembling the bows ready to hit the range. The only problem was their stringers kept slipping on the upper limbs.
This is something I have seen loads of times before and is a common problem especially if the bows are at all wet or the archer is less experienced in stringing bows. The archers put the stringer pocket on the lower limb and loop on the top one, go to stand on the loop and lift the bow. The problem is the loop on the upper limb slips down towards the centre of the bow.
Most stringers have a leather or rubber section in the upper loop to grip the bow limb, but I’ve noticed that they aren’t always that good. This is true of whether they are string or nylon webbing sort. Some just don’t offer that much of a grip to the bow, being either too small or smooth.
example of a webbing stringer

Example of a webbing stringer with a small stitched in pad

string or rope stringer pad

Example of a string or rope stringer pad which is pretty smooth

So this is where the tip comes in.
You can use a piece of something like slip-A-grip to go over the sewn in grip. You might recall I wrote an article on this stuff ages back title Don’t lose your grip for cheap arrow pullers etc. It is a open weave material with a rubber or plastic coating which offers the user greater traction. I use it a lot in my motorhome for the cupboard shelves to plates and stuff moving round. You can buy it from pound shops or any decent super market, I got mine from Lakeland.
Using this material offers a greater grip on the limb, so the stringer is less likely to slip when under tension as you string the bow. You still have to be careful and take your time but does help a bit.
example of a webbing stringer with grip fabric

example of a webbing stringer with grip fabric

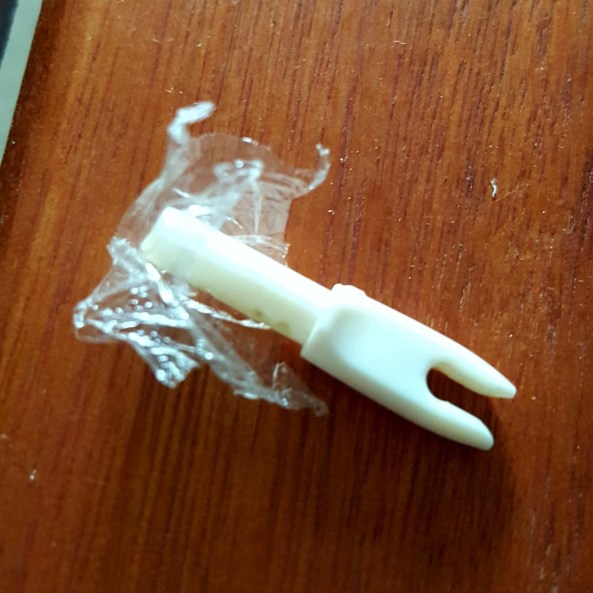
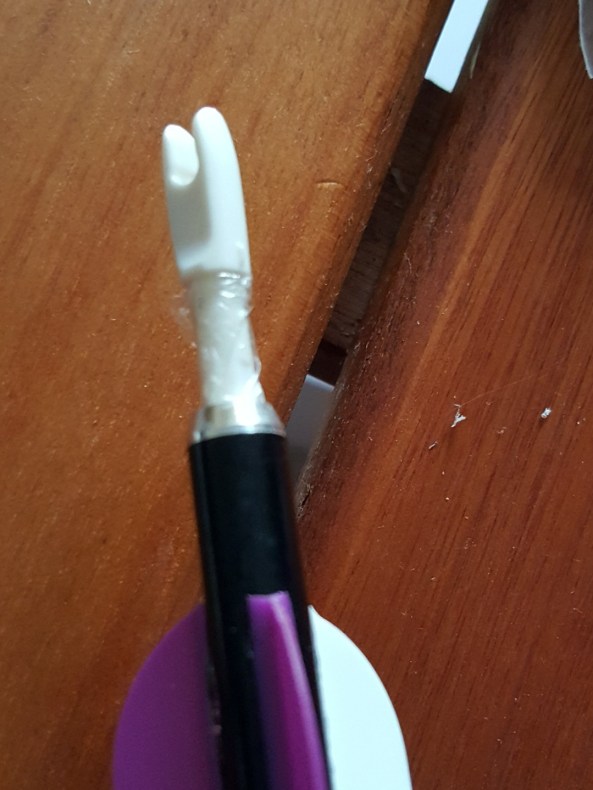
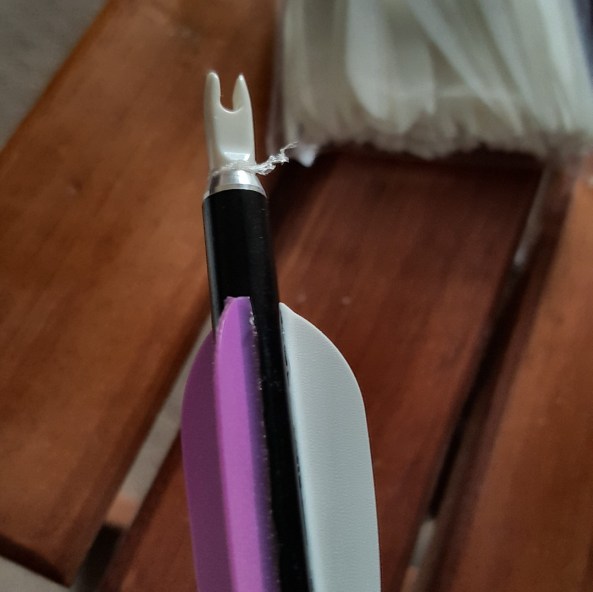
I’ve used the same material to patch up an old stringer where the grips worn off as shown in the pictures below.

Old worn stringer

I then added some grip material, securing with some waxed string so doesn’t move. I’ve used this stringer for over 8 years and for 3 years with this material on it, so I know it works. It wears out after a while but is easy to replace and I find it gives me more confidence in using the stringer as I know it is unlikely to move or slip even in wet conditions.
stringer with grip

Same stringer with grip material

I hope you find this of use and thanks for reading.
Broken Carbon arrow wrapped in tape

Quick tip – Preventing carbon splinters in quiver

The vast majority of us are responsible archers, by this I mean we clean up after ourselves and don’t leave rubbish cluttering up the woods.
So if we break arrows we take the bits home, but if these bits are broken carbon arrows we don’t want carbon splinters in our quiver.
I think this is potentially the most useful of the non-normal uses for micropore tape the sort you might have in your first aid kit. I also think this is good for all archers to know whether they shoot carbon arrows or not.
Micropore Tape - how useful

Micropore Tape – how useful

When carbon arrows break it can result in very sharp splinters (splinters that aren’t picked up in x-rays and can be very hard to extract). On a side note I find it is amazing how few people realise the potential issues of getting these in your skin.

If I find a broken carbon arrow I will wrap tape round the end and down the shaft if required, so protecting myself from any splinters, before putting in my quiver for disposal later.

Broken Carbon arrow wrapped in tape close up

Broken Carbon arrow wrapped in tape close up

This means I’m less likely to have splinters in my quiver or worse me.  I use the same technique on aluminium arrows when they break so the sharp edges don’t catch on the quiver or me.  Hope this is of use.
Thanks for reading.

Arrow making tips and advice


Okay so as many of you know I make a lot of arrows and if truith be known I quite like it. I find the process of making them relaxing a lot of the time. The thing is I tend to make wooden arrows and not many with aluminium or carbon shafts these days since Sharon swapped back from shooting barebow to shooting woods.

Well I’ve been making up some club training arrows in readiness for some new courses we are running in January. They are Mybow Cadets from Merlin Archery and I’ll be posting a review of the arrows in a few months, but in the meantime I thought I’d share this tip. It was one given to me by Steve a fellow Briar Rose club member who is very experienced in shooting barebow and making up such arrows.

When making them I noticed the nock tends to rotate in the shaft, making it a bit tricky at times when mounting them on the fletching jig. Now you could add a drop of glue to secure them, but Steve suggested using cling film. Yes, the stuff that normally covers your supermarket produce.

If you wrap the end of the nock that fits into the shaft with a little film and then insert the nock it provides a tighter fit whilst still allowing some movement for alignment purposes.

The amount required varies but with a little trial and error I found a length of 5 to 6 cm and about 12 mm wide worked best. Wrapped tightly round the end that fits in the shaft and it seems to work pretty well.

Well I hope this helps, let me know how it works for you or if you have any other advice or such fixes. My thanks to Steve for the tip.

Thanks for reading.